Mother's Day Sunday, May 11th. That means you only have like a week and a half to get your gifts together. Well, stress no more! Have I got the project for you! You may have seen floating around the internet for the last couple of years; a card called an "exploding card" or an "explosion card" I'm going to turn this into a mini scrapbook album keepsake album for mom! This could even be a project to get the kids involved, as I will be for a wonderful grandma gift for the big day! I'm really excited about this project and I'm looking forward to having you all back this weekend!
I truly had intentions of posting last Wednesday to give a sneak peak at this past Sunday's project. I really did. I swear. Well, when that day passed, I figured that I would just surprise everyone on Sunday with the project since I wasn't able to get time to post. Well, I had good intentions, anyways. Life happened, as it has so much lately. Tomorrow I will definitely be posting again for the Sunday's project and the tutorial will definitely be put up as normal on Sunday. Working these new, crazy hours, finals week coming up, working part-time, instructing and managing a family have finally gotten the best of me.
While I am working really hard to better manage my schedule, I appreciate everyone coming back weekly and stopping by. I am definitely not done on this adventure! Thanks for stopping by today and look forward to revealing this weeks' project tomorrow! Until then... Craft on! To say that it has been a crazy couple of weeks would be an understatement. With working 2 jobs, school and kids, it's been really tough to find time to get everything in that I need to. I didn't help matters at all when my internet went out for almost 2 days starting Saturday night. But, I'm finally able to post the tutorial for the flower pot card. Enjoy!...  It's Sunday and I'm usually posting the new blog with craft tutorial but my internet is out at home and we won't have a technician out until tomorrow morning. So I hope to have it up and posted tomorrow in between jobs.
Be sure to check back tomorrow for the flower pot card tutorial! As always....craft on! So, tonight's the monthly Scrap In! Join me from 3-9 to work on your projects, network with other paper crafters, use all of the classroom products and equipment and just have a good time. I will be working on All of this for only $5! Look forward to seeing some out there and having some good company!
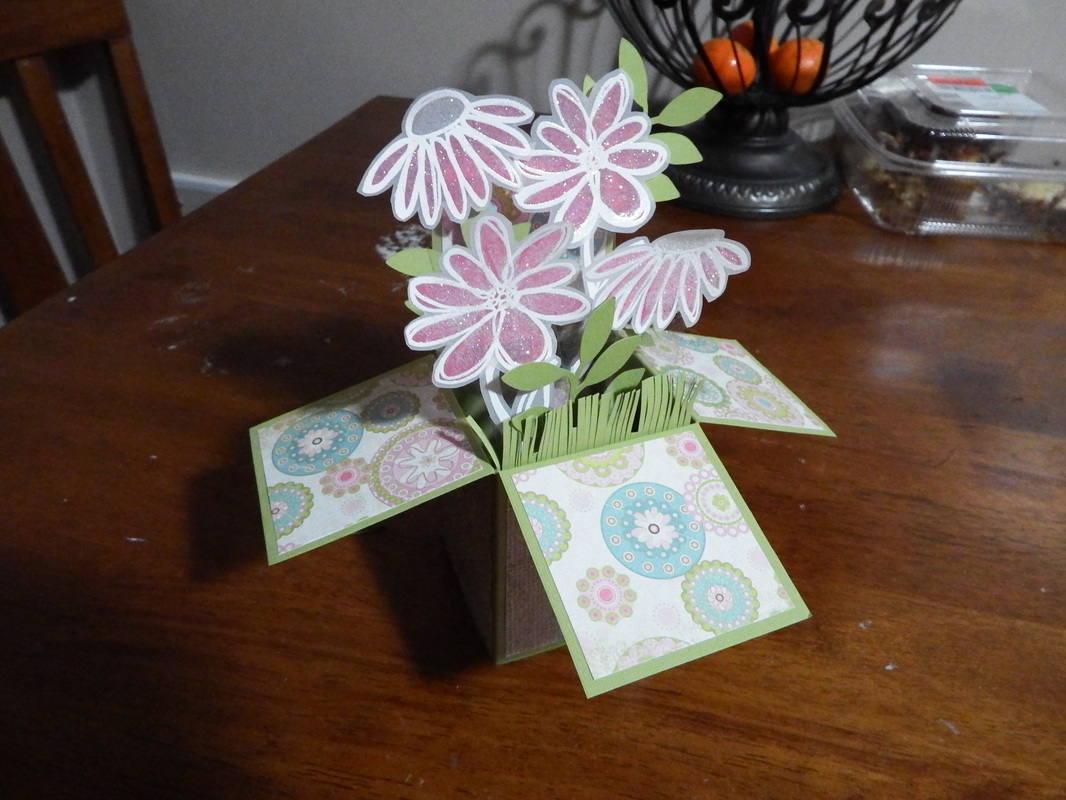
So, it's already Wednesday and that means it time to reveal what this weekend's project tutorial! I'm not complaining at all. It's been a crazy week with crazy work hours, school deadlines and no sleep. Bring on Friday! For this week, I will be showing you how to make a flower pot card. The card is shaped as a pot, and instead of opening a greeting, you pull out the "flowers" and the message is hidden on that. It's very cute and looks much better than I'm sure I am describing it. This card is great for spring and Mother's Day, or just for about anything else. Hey, it sounded good in my head anyways! So, stop on back on Sunday and get your tutorial on!
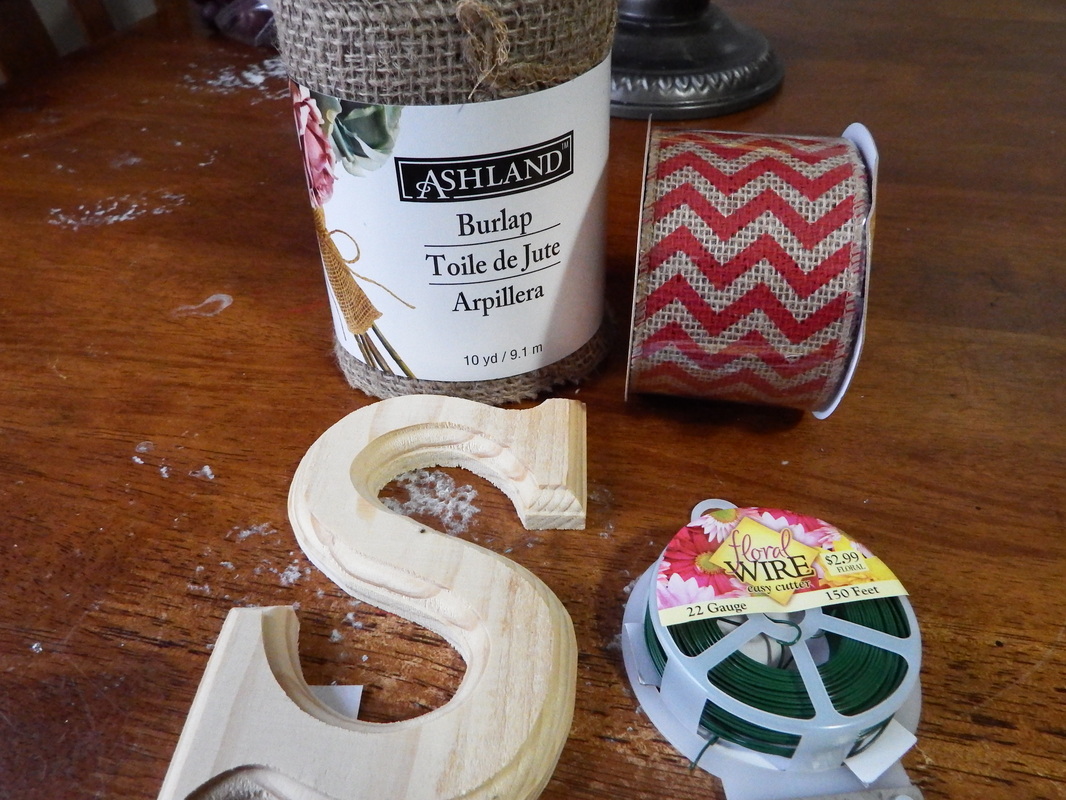
Also, don't forget that this Friday is the Scrap in from 3-9. For just 5 bucks, you can come spread out your stuff and work on your own projects, and use all of the MANY things that Michael's has in their classroom. If you've ever wanted to try something before you buy it, then now is the time! Hope to see some faces this Friday! I look forward to seeing you all back! And until then... Craft on! It looks like spring is finally here to stay. Time to start thinking of bright colors, pastels and summertime projects! What better way to get started than making a fresh new wreath to get you excited for the fresh new weather! I am so excited to show you this week's project and proud of how it turned out. This project turned out to be fairly simple. The hardest part of this project, and it really wasn't hard at all, was getting the technique down of wrapping the wreath frame with the burlap. Once you get that, the rest is a piece of cake. Let's get started! 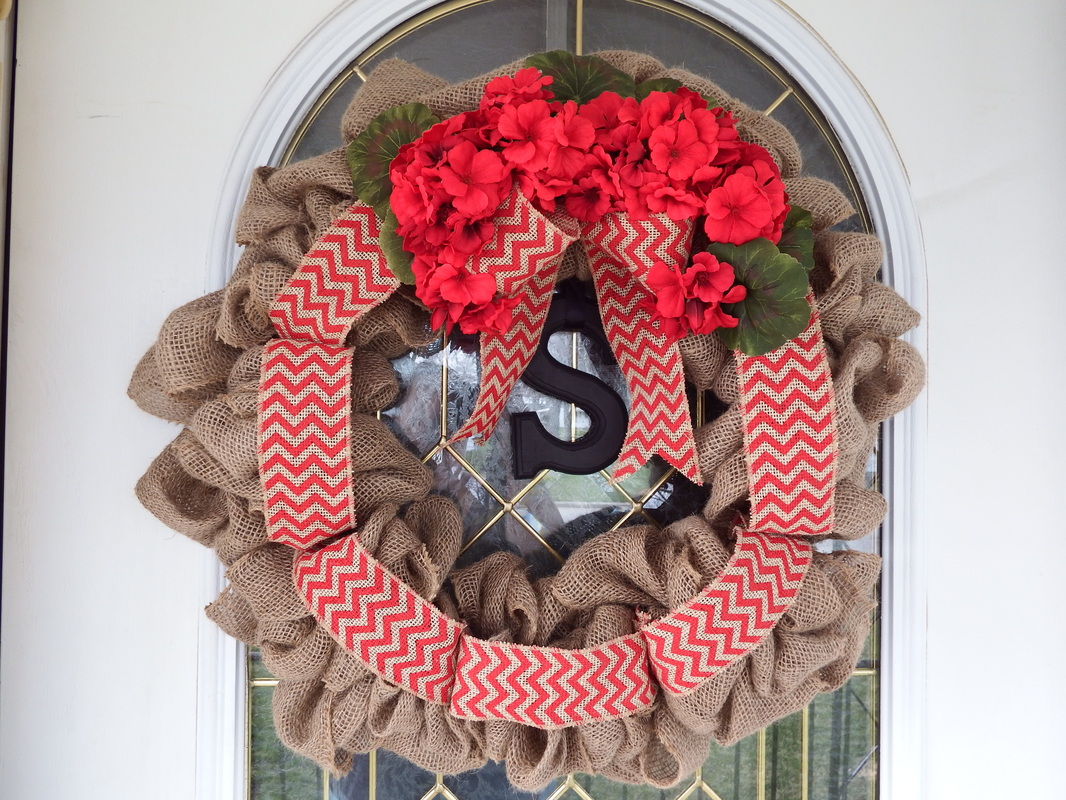
In case you didn't know, I do have my own Etsy Store and I love to make things for it. Normally, I don't use my blog to promote my store, but I was just so excited about this idea that I had to share. :) After some brainstorming, I thought it would be wonderful to add my own papercrafting items to my inventory. I will be creating the usual finished cards, etc but also (and this is what I think is so exciting!) will be finished embellishments, such as flowers and card making kits. Each kit will have all the ingredients to make your own set of matching cards. The cards will not be identical but will share a common theme.
The kits will contain all the items necessary to create all of your own creations, without the expense of buying all of the tools and the time it would take to cut, stamp, emboss, etc. You will be able to create your own handmade cards for a fraction of the time. These kits would be great for beginners and seasoned crafters alike! I look forward to showing you some of my new items in the very near future! Until Sunday... Craft on! 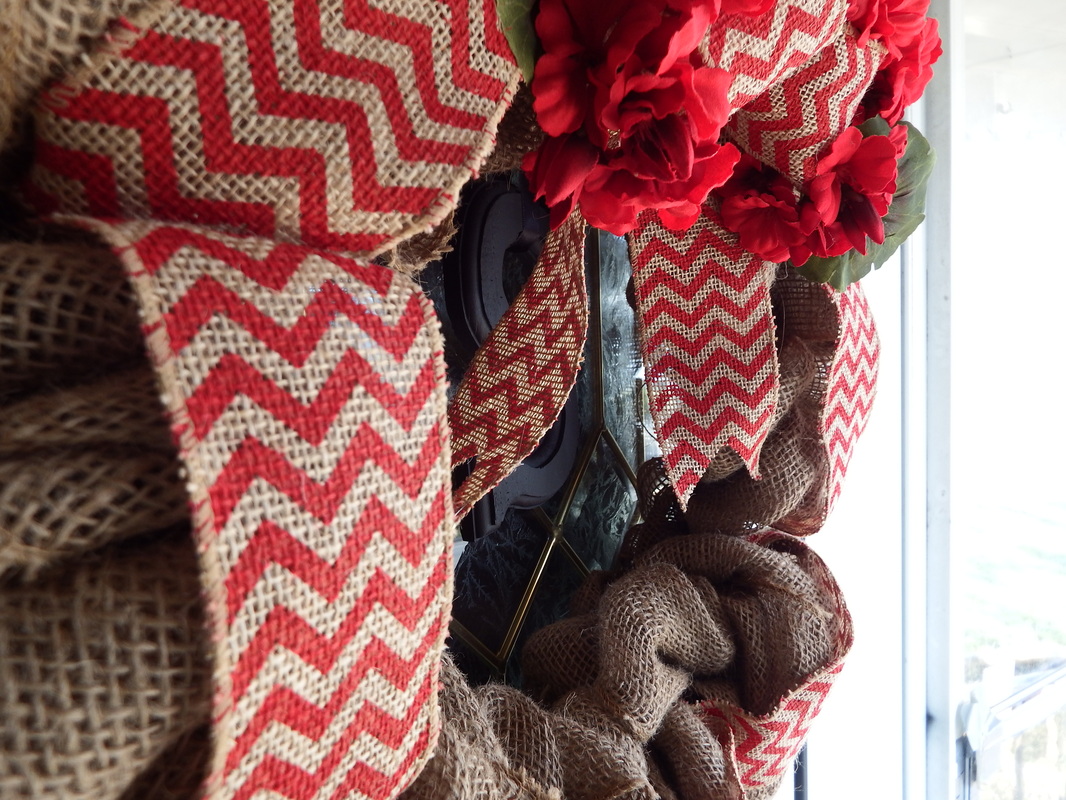
Spring has finally decided to make an appearance! Along with spring comes yard work. I'm not a huge fan of spring as everything is so dirty, muddy, doesn't yet have leaves and the weather is so indecisive. So, tell help me spruce up the house a little; I decided to do one of those burlap wreaths that are everywhere!
Here is a sneak peak of my finished wreath ( I made mine last weekend). Of course, I'll be posting full pictures and the tutorial on Sunday, so check back to find out how to make your own! Until then, I have some errands to run and a ton of things to do before heading off to my full-time job later this evening. Until Sunday..... Craft on! 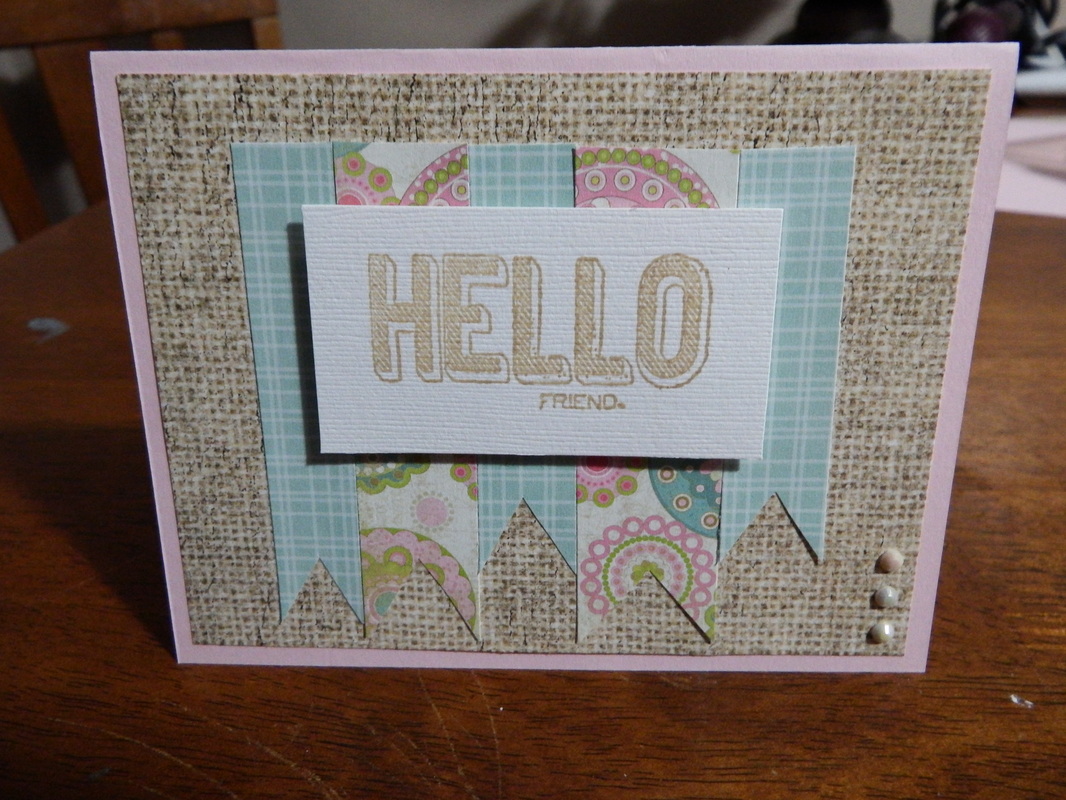
It's Sunday...the day before Monday. I hope that everyone is having a great weekend and enjoying the nice weather (at least in my area). Spring seems to have decided to show itself and is my inspiration for this easy card. I was able to do this card in less than 15 minute...from design to finish. This card is a great beginner card as it has very little necessities and also a great template to use when you need a card in a hurry!
So, spring is finally making its appearance. I do love winter so seeing it go is bittersweet for me. I do love being able to take the dog for walks at the park and of course I LOVE my garden so I'm excited for a return to both.
After spending some time in the yard a couple of days ago, I decided that my house needed something to spruce it up just a little and welcome the new season! Soooo...this is inspiration for the next project that I will be putting up in just over a week. I am just so excited to try something that I have never done before that I had to share. Any guesses on what I could be working on? Any? Check back this Wednesday for details, and of course come back in two Sundays for the full tutorial. If you're looking for inspiration before then; there is the card tutorial coming this Sunday and of course my 3D card class this Sunday from 12-2. Hope to see 
It's Wednesday and that can only mean one thing...ok, maybe two! It's hump day AND it's project preview day!
I seem to teaching and have a lot of visitors to my blog that are very new to card making, SO I'm going to be doing another simple card that you can make on your own. I will show you that simple doesn't have to be boring! So, mark your calenders, and get ready to create this Sunday. And speaking of creating on Sunday...remember that cute 3D pop up card I posted last week? Well, I will be teaching the first of what I hope will be many classes this Sunday from 12-2. Sign up is limited for each class, so stop in and sign up today! Until Sunday everyone! Craft on! Many times people will tell me that they would do cards or scrapbook if they had either the money or the creativity, or both. And I'm not going to lie; paper crafting can be expensive...but it absolutely doesn't have to be! I'm gonna share my tips and tricks for all you beginners out there who have been wanting to get started
I love to look at all of the new trends. I REALLY love it when I can learn a new trend and it turns out this darn good! This particular has been around for a couple of years, but I just came across it within the last month or so. I've trying to figure out a way to incorporate it into my current teaching schedule and I will be adding this to my regular stamping card class.
This card is 3D, stand up on it's own and folds flat so that it can fit into a 6 x 8 envelope. I'm so excited to teach this! Come visit me at work tomorrow from 2-4pm while I demo this project and get everyone signed up to learn this great new project! This makes a great gift for spring time holidays like Easter and Mother's Day. Hope to see everyone o A big question that I get asked a lot at work is from new scrappers and beginning card makers is "What do I need and should buy when I'm starting out?" This Sunday's blog is all about What you need, what can wait and what you really don't need.
It's a busy week, with starting a new job, classes and a demo this weekend, and a ton of homework. I'm burning the candle at both ends (again) this week but I didn't want slight y'all and not post something. So, while there will not be a project, there will be tons of information that will be just as informative and useful on your crafting journey. So, until Sunday my creative friends...craft on! 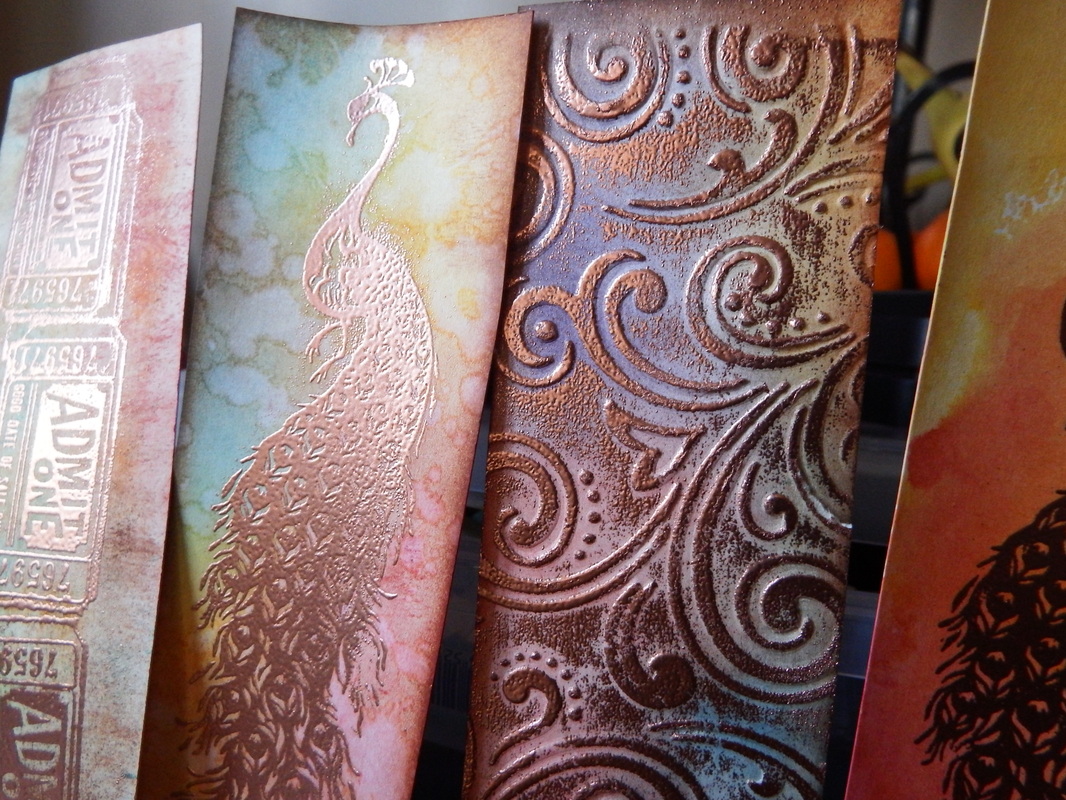
I finally have a heat gun so that I can show you how awesome these bookmarks are when they are heat embossed.
Just to prove how easy this project is, my seven year old, Matthew did the bookmark on the far left...and it turned out pretty good! Seriously folks, this isn't hard. The second bookmark was done with the basic technique and some water splattered on it and dried The third bookmark is a technique that I am really proud of because it is one that I came up with myself; using an dry embossing folder AND heat embossing. Speaking of embossing folders, Anna Griffin's new emboss and die set for the Cuttlebug came out today and drool every time I see it....one day... Finally, the last folder has a watercolor effect to it using the ink pad and spritzer to make it. Below is a better picture of all 3 bookmarks that I made 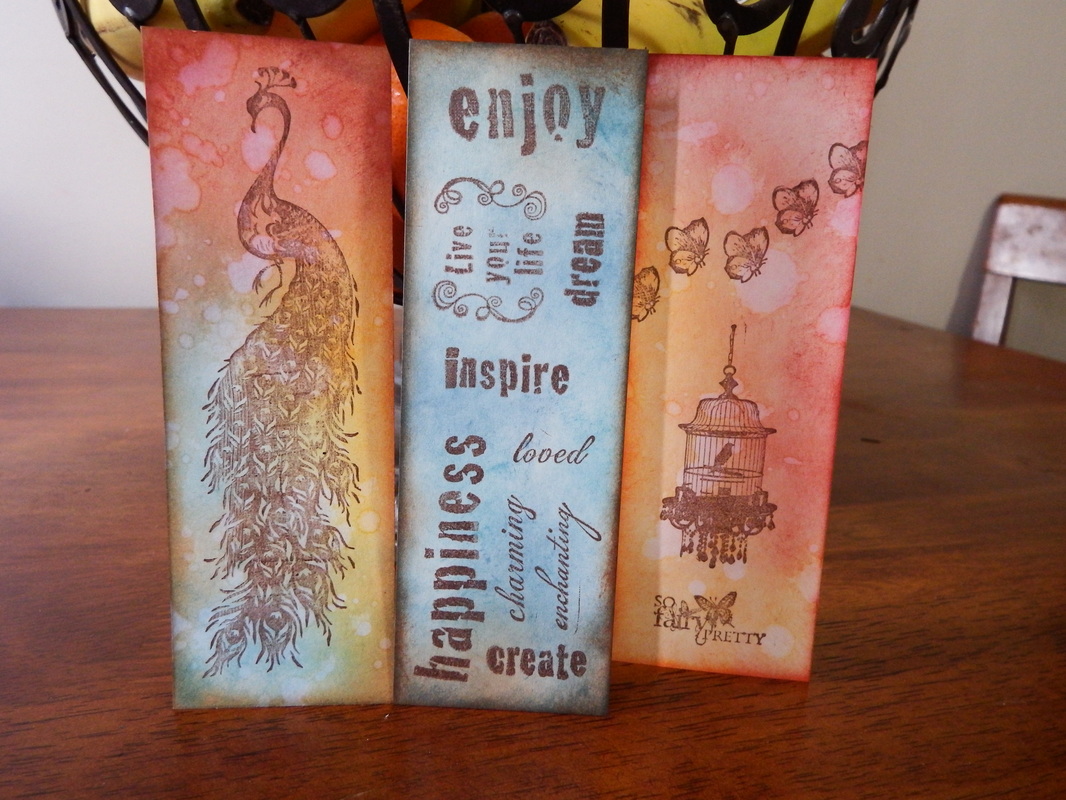
I teach several different classes for paper crafting, but the class and technique that always gets the most attention and comments is the distressing technique. Everyone is always commenting on how good the tags look and how it looks really hard to do. Well, I'm gonna give a quick and shortened version of this class. There are several different versions and techniques that I teach in this class and this is the most basic one. I say basic, but the only thing that is basic is the effort, the results are still very cool! Let's get started!
It's happened again.... another busy week! Lots of new things happening this week; including a new job, a custom project that I've been trying to find the time to do, extra hours at my part time job, and the list seriously goes on an on. So what am I getting at? Well, I usually have my plan for this week's project but I haven't been able to come up with any good ideas. So, I guess as Sunday rolls around, you all will be just as surprised as myself to see what I'm going to have!
Tomorrow is also my monthly, evening crop and I'm excited to be able to get some projects done without having to worry about kids bothering me, doing house cleaning and other the other details that detour my paper crafting plans! I look forward and encourage everyone to stop out and say hi, use my stuff and pick my brain. I love to teach what I do and I love to have company while I do it! Also, I wanted to share a new blog from a friend of mine that is just getting hers started. She's a mom of 7 that can cook her butt off and would really appreciate some new traffic to her blog! So head on over to Ragtime Kitchen Dance, scope out her brand spankin' new blog, say howdy and tell her that Melissa sent ya over! 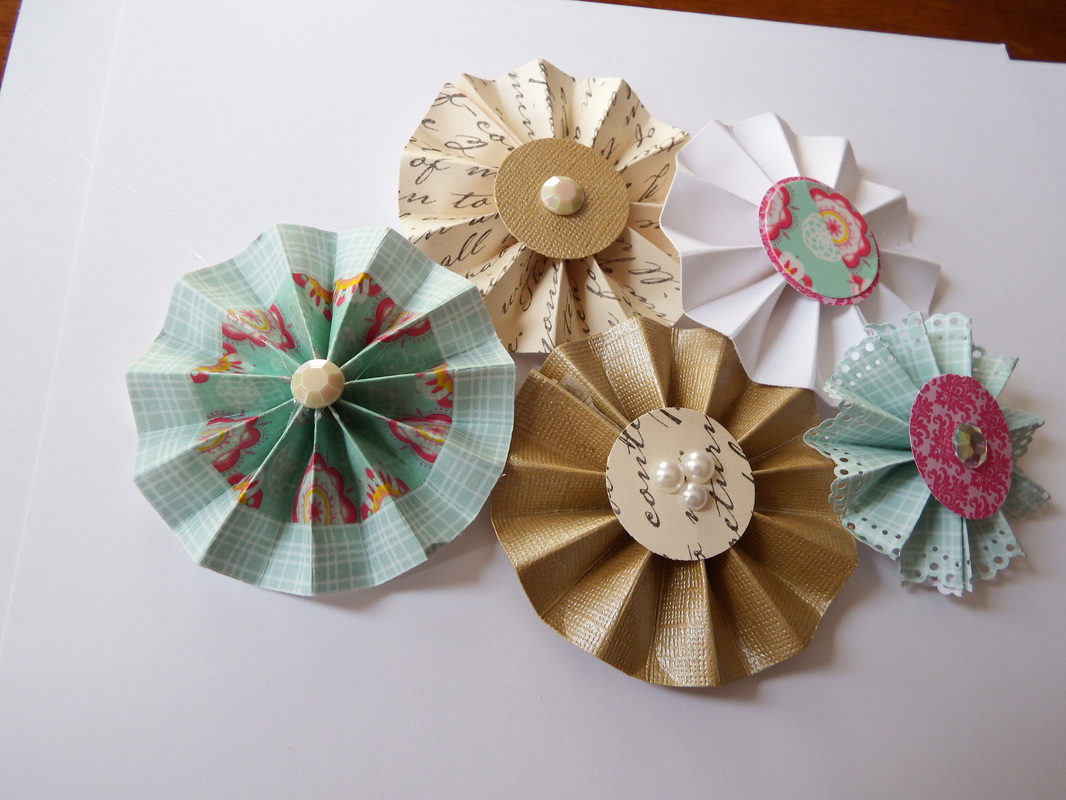
I absolutely love a cute project that doesn't take a lot of time. And I love being able to make my own embellishments myself. Store bought embellishments can be expensive, so finding ways to make my own to match what I'm working on AND save money? I'll take it! These rosettes were super-easy to make and can be done with just a few supplies and a few minutes of your time. Let's get started!
It feels like it has been forever since I've posted anything....Ok, almost a week but it still feels like forever to me. I was working on some cards last night with a new stamp set that I purchased and would like to show you what you can make it less than an hour. The stamp set was purchased for around $6 and with other materials, you are looking at another $2. BUT, these items could have easily made another 3 or 4 cards. Making your own homemade cards doesn't have to be expensive or time consuming. So, here's some tips on what to buy when you are just starting card making:
1. Coupons! All of the major craft stores have them...use them. Many times, if something is not on sale that week, use a coupon to get your higher priced items cheaper. This would be great for getting a 12'' paper trimmer or even a pack of stamps! Make trips to all of the stores if you have to. If you don't want to pay full price for 3 items, then go to 3 different stores to use them coupons. There's more than one way to skin a cat! 2. Buy a pack of card stock in colors that you can use for many different projects. I always recommend a pack of white, tan or black. Almost everything goes with these colors! 3. Buy your inks the same way you would paper. Go for brown or tan. You can get away with using either one in almost any project. 4. Choose a set of stamps that has many different uses to it, such as one that includes different sentiments, like: "Happy Birthday" or "Thank You". These types of stamps will be used a lot on the front of your cards and it's always a good idea to have that one "go to" set. 5. If you're completely new to card making, ask questions. Ask store employees, find a group of crafters, join a classes. (Prepare for shameless plug) Some places even have nights where you can just go to work for an evening. Take advantage of this and pick the brains of the crafters and instructors there. (See!) Everyone has to start somewhere and we have all been there. 6. Buy inexpensive products as you're learning. It's inevitable that it will take a little practice and patience when you're learning. That being said; there will be lots of wasted paper, adhesive and products. So, save a little money and buy the store brand card stock. 7. Clearance aisles! They will be your best friend for creating your new stash. Check them and take time to pick through them, you never know what you can find! Don't be intimidated my card making, it's easy, fun and doesn't have to cost you a small fortune to create great handmade cards! Until Sunday...Craft on! | 
AuthorHi, and welcome to my blog! My name is Melissa. I'm an EMT, and a mom of 3 wonderful boys with a full schedule. But, somehow I manage to find time to craft. I have always had a love for all things crafting Now, I can share my pieces, ideas, tips, tricks and maybe even some failures (because you don't know unless you try) with my fellow DIY-ers. My Etsy Store
Follow me on Pinterest! ArchivesJanuary 2015 Categories |
 RSS Feed