It looks like spring is finally here to stay. Time to start thinking of bright colors, pastels and summertime projects! What better way to get started than making a fresh new wreath to get you excited for the fresh new weather!
I am so excited to show you this week's project and proud of how it turned out. This project turned out to be fairly simple. The hardest part of this project, and it really wasn't hard at all, was getting the technique down of wrapping the wreath frame with the burlap. Once you get that, the rest is a piece of cake. Let's get started!
I am so excited to show you this week's project and proud of how it turned out. This project turned out to be fairly simple. The hardest part of this project, and it really wasn't hard at all, was getting the technique down of wrapping the wreath frame with the burlap. Once you get that, the rest is a piece of cake. Let's get started!

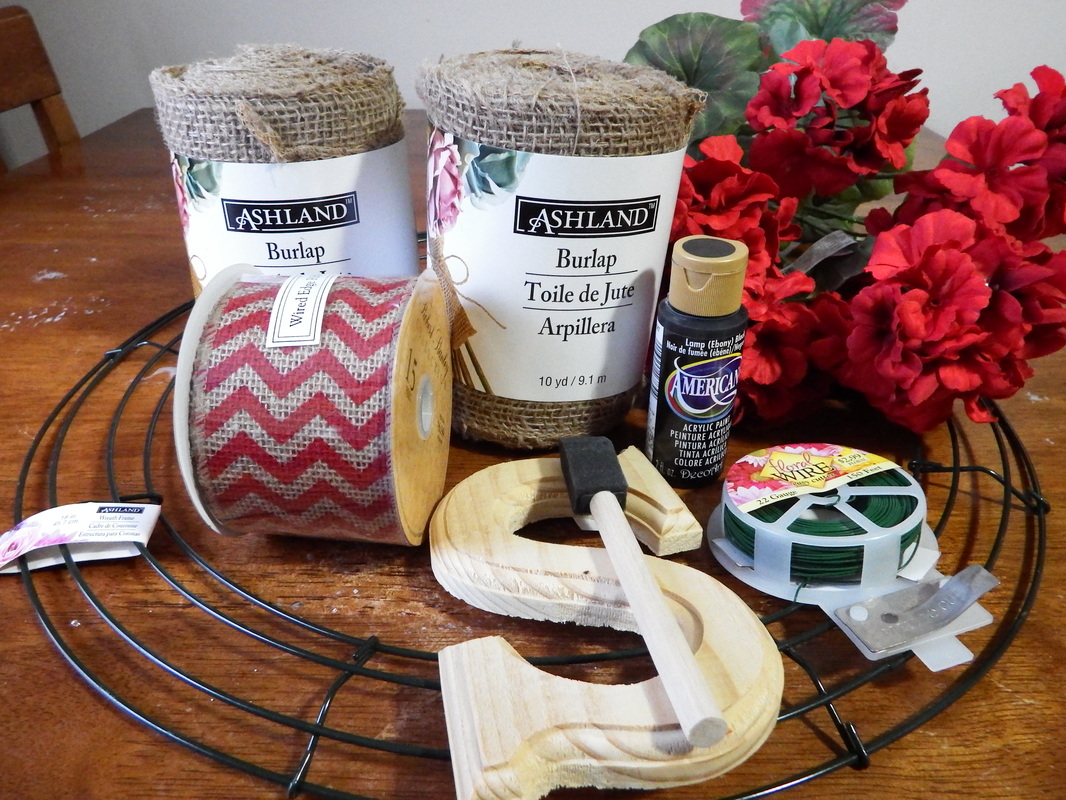
Your necessary supplies include:
1. 2 rolls of 10 yard burlap. Mine was fairly wide, at approximately 5 inches
2. 1 wreath frame. Mine was 18".
3. Flowers of your choice. I'm putting red geraniums in my front yard this year so I wanted my wreath to match.
4. 1 roll of floral wire
5. 1 monogram letter, black acrylic paint and foam brush
6. Matching ribbon
7. Hot glue gun and glue sticks
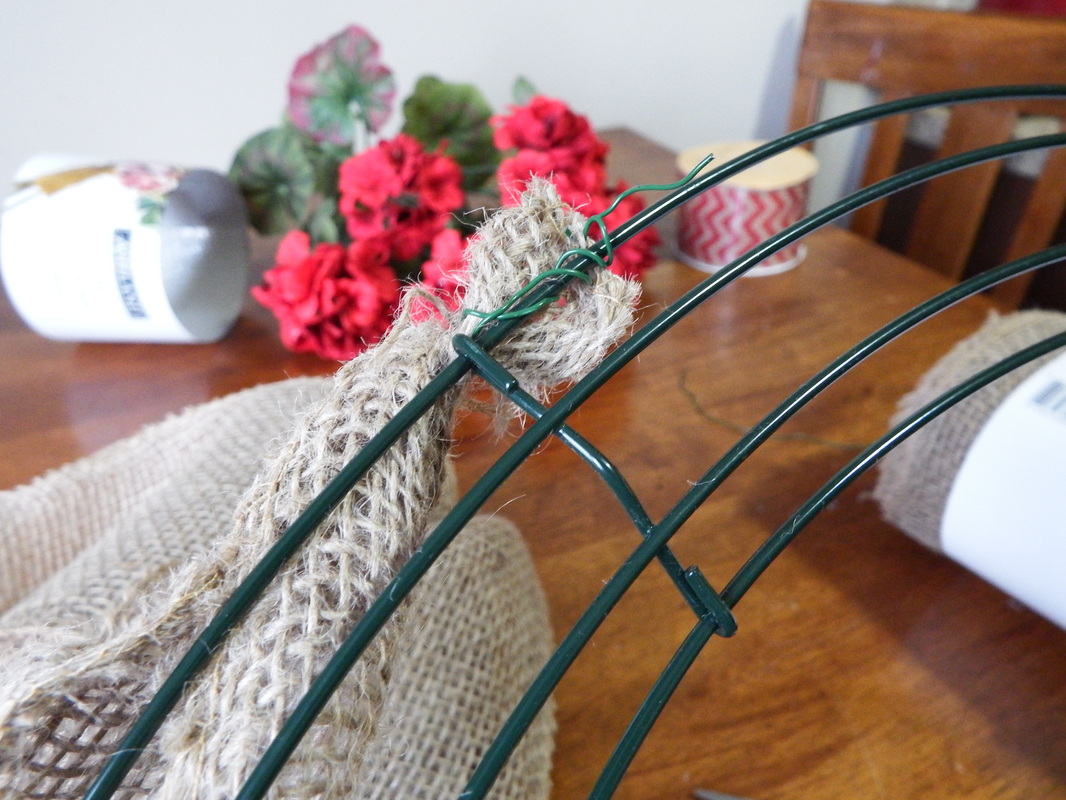
Start by securing one end of your burlap to the frame with floral wire.
*Note* I actually found that securing to one side or the other rather than the middle part of the frame worked best for starting your weaving.
*Note* I actually found that securing to one side or the other rather than the middle part of the frame worked best for starting your weaving.
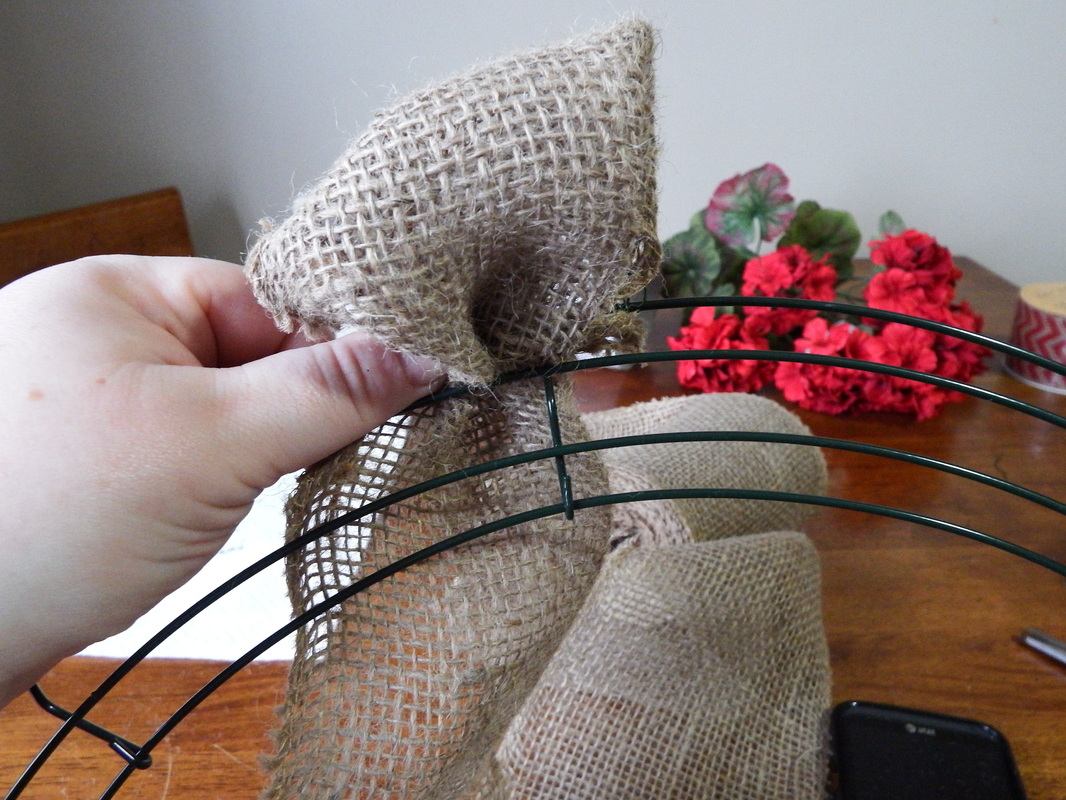
Next, start by pulling the burlap up through the first "section" of the wreath frame. Pull on the tail end of the burlap to create a loop.
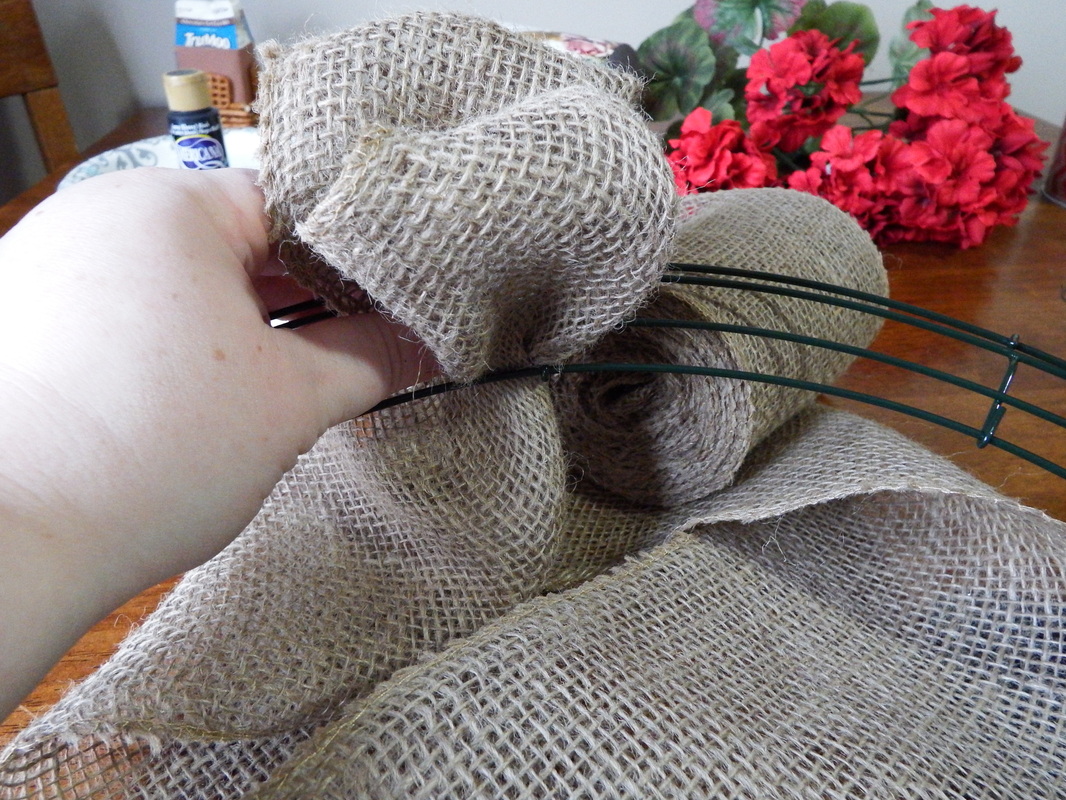
Repeat weaving the loops up from the bottom of the frame, pulling on the tail end to create your loops. You can make your loops as small or as "fluffy" as you like. Just keep in mind that the bigger you make them, the more of your burlap you use. I ended up using all of my rolls of plain burlap. If you want extra fluffy loops then you may want to consider buying an extra roll of burlap just in case.

As you weave your loops through your frame, make sure that you are pushing them down to make them closer together. If you don't, you may have gaps and be able to see your frame in between the loops.
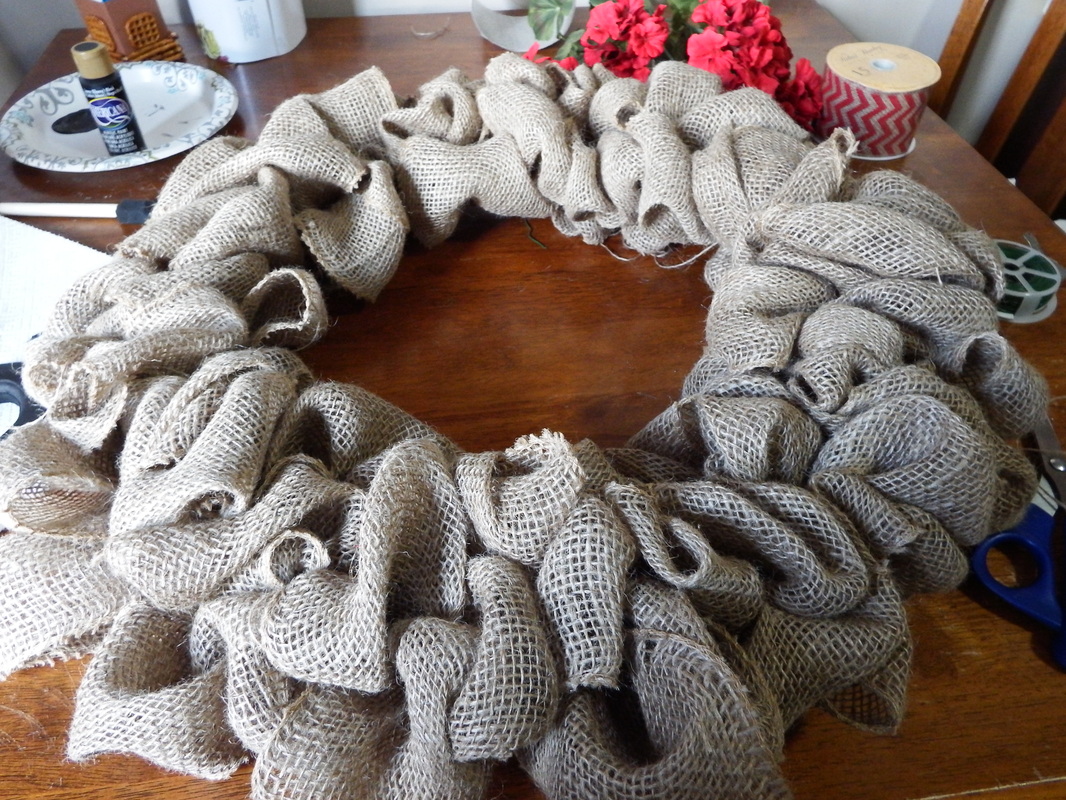
After you've woven the entire frame, go ahead and secure the end to the frame as you did at the beginning. Doesn't it look great, even without any decorations? I love this look!
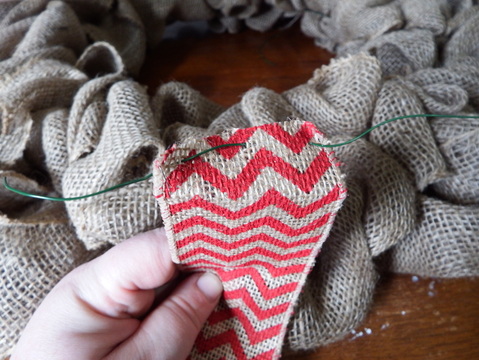
Now, on to weaving in your printed burlap. Start by weaving floral wire through one end of the printed burlap, like a large stitch. This will help to secure the burlap better, without it slipping off and without using any glue. I promise this is much better than simply wrapping the end in wire then wrapping the frame.
I neglected to take a picture of the next step, but you are just attaching the weaved (at regular intervals) in between loops as best as you can, to the wreath frame. It's not really necessary that you weave each section with the floral wire, but I did it just to give myself more peace of mind. Nothing irritates me more than when a projects comes or falls apart!
I neglected to take a picture of the next step, but you are just attaching the weaved (at regular intervals) in between loops as best as you can, to the wreath frame. It's not really necessary that you weave each section with the floral wire, but I did it just to give myself more peace of mind. Nothing irritates me more than when a projects comes or falls apart!
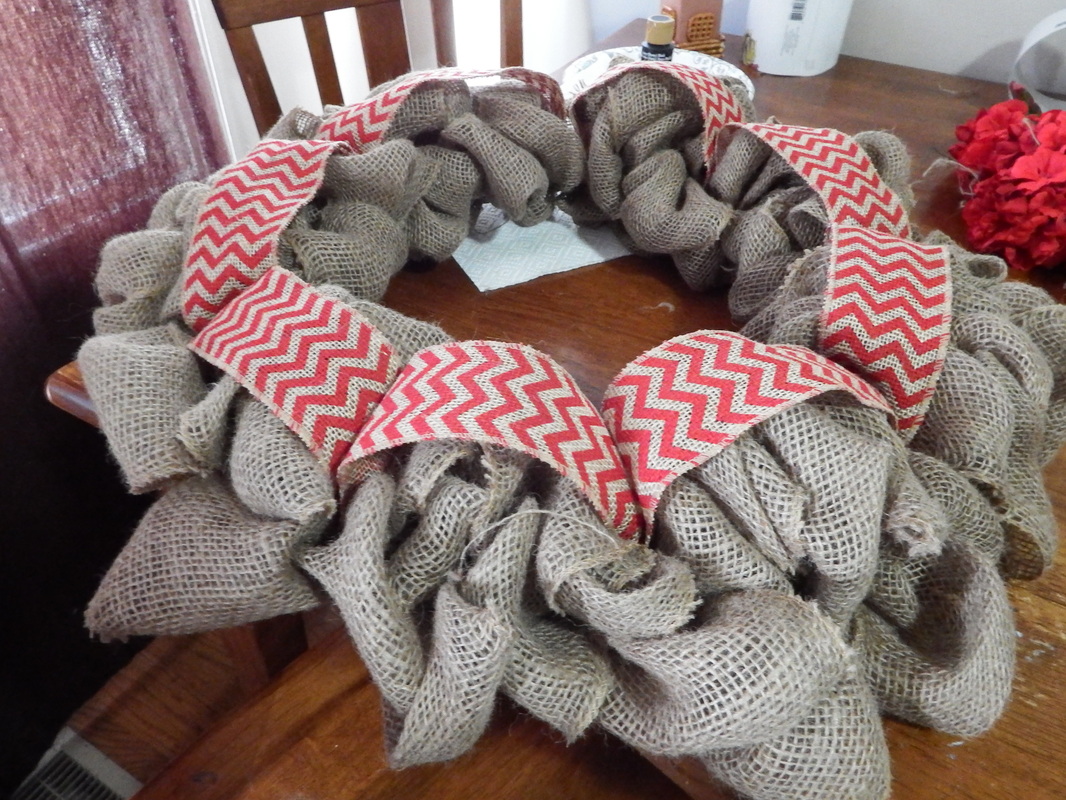
Your wreath should now look something like this! See...easy and it isn't even taking too much time! You will be done before you know it!
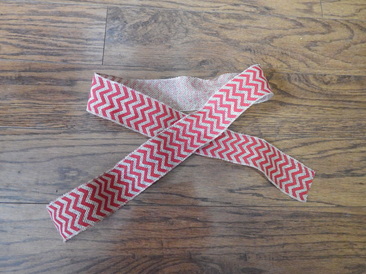
Now, on to your bow! I originally wanted one of those fancy bows that you see in the stores, but I just couldn't figure out how to do it with the pattern showing in the front on all of the loops. If you know, please send me a link or show me! Anyways, I settled on this one. It's super simple and still very cute!
To make this simple bow, lay your printed burlap on the floor as show above. Now, gather the middle and secure with some floral wire. THAT'S. IT. Easy right?!?
To make this simple bow, lay your printed burlap on the floor as show above. Now, gather the middle and secure with some floral wire. THAT'S. IT. Easy right?!?

Easy peasey, lemon squeeze-y!
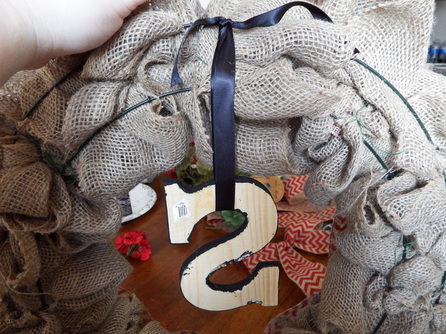
Now, after you've painted your letter in your chosen color, go ahead and cut a length of ribbon. Just guess, but remember you can always take some off but you can't add any on after you've cut it. Now, go ahead and tie it to one of the wires of the wreath frame. Play with the length until you get it in a spot you're happy with. Remember that you have to be able to see it under the burlap.
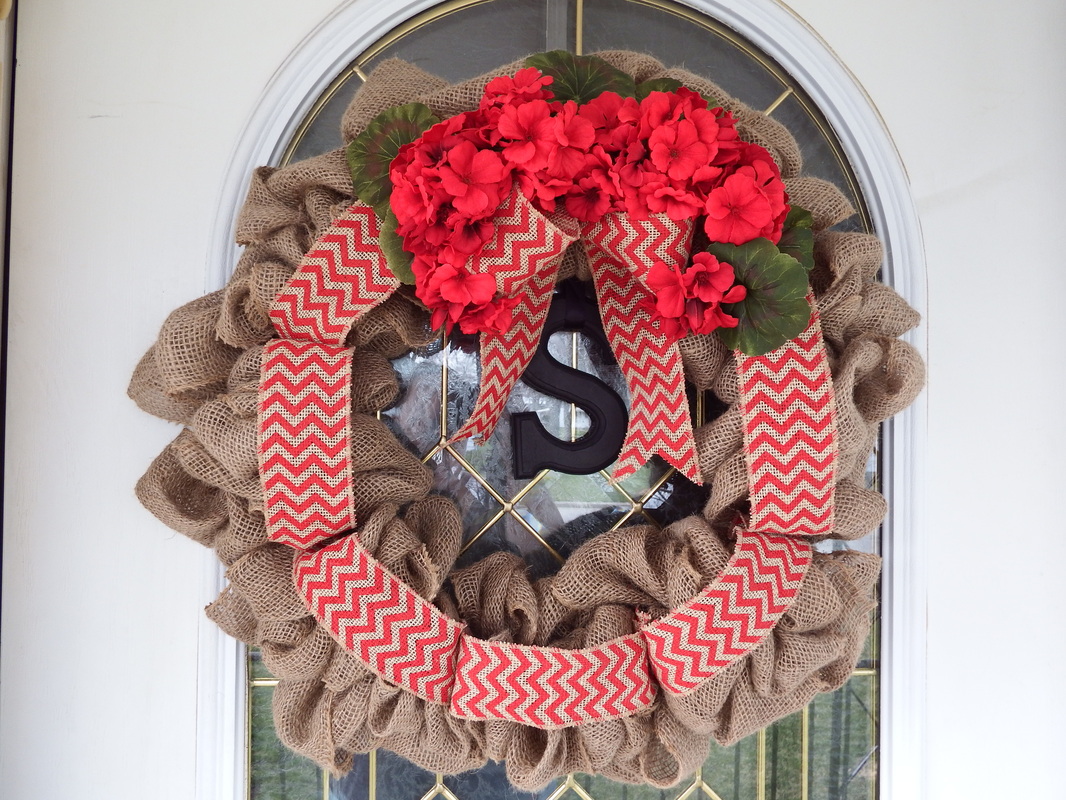
Lastly, get out that glue gun and glue down your ribbon. Next, cut your flower stems to lengths that you need, secure them with glue behind the ribbon and burlap loops, being careful to hide the stems. Don't forget about those leaves!
Voila! That is it! Not too intimidating now, right?! Go ahead and give it a try and show off your handy work!
Until next week....
Craft on!
Voila! That is it! Not too intimidating now, right?! Go ahead and give it a try and show off your handy work!
Until next week....
Craft on!

 RSS Feed