I absolutely love a cute project that doesn't take a lot of time. And I love being able to make my own embellishments myself. Store bought embellishments can be expensive, so finding ways to make my own to match what I'm working on AND save money? I'll take it! These rosettes were super-easy to make and can be done with just a few supplies and a few minutes of your time. Let's get started!

Supplies you will need:
1. 12" x 12" card stock or scrapbook paper of your choosing. (I also thought that wall paper would work great too!)
2. Paper trimmer
3. Adhesive. It seems that I forget to include something in my picture and this week this was it!) I used scrapbook adhesive, but any strong holding glue or adhesive would work great.
I also used some extra supplies to add a little extra something to my rosettes. These are not needed at all if you don't have them on hand, but rather just to give you some extra ideas.
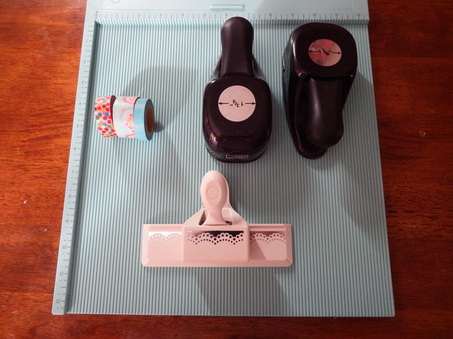
1. Scoring board. I love mine and I feel like it doesn't get enough use!
2. Lace edge paper punch
3. Washi tape (love this stuff!)
4. 2 circle punches
5. Self-adhesive rhinestones and pearls (not pictured, because I'm apparently really absent-minded this week!)
1. Scoring board. I love mine and I feel like it doesn't get enough use!
2. Lace edge paper punch
3. Washi tape (love this stuff!)
4. 2 circle punches
5. Self-adhesive rhinestones and pearls (not pictured, because I'm apparently really absent-minded this week!)
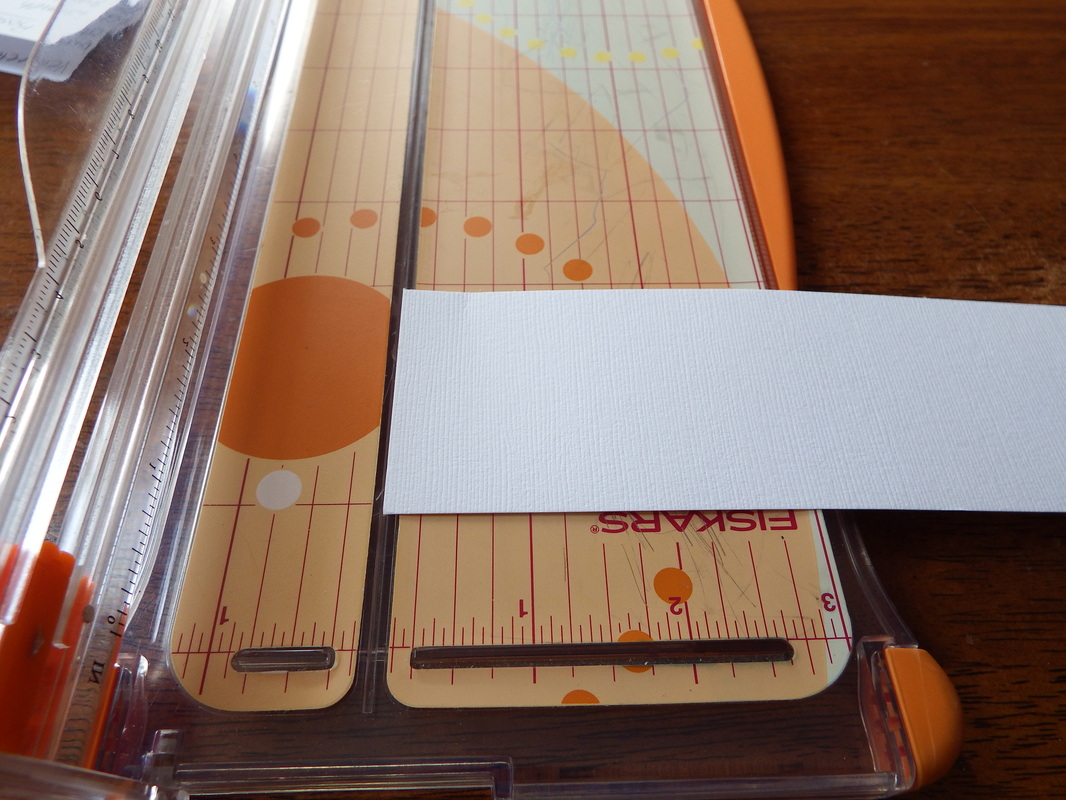
To being, cut your paper to 1 1/2" x 12" strips.
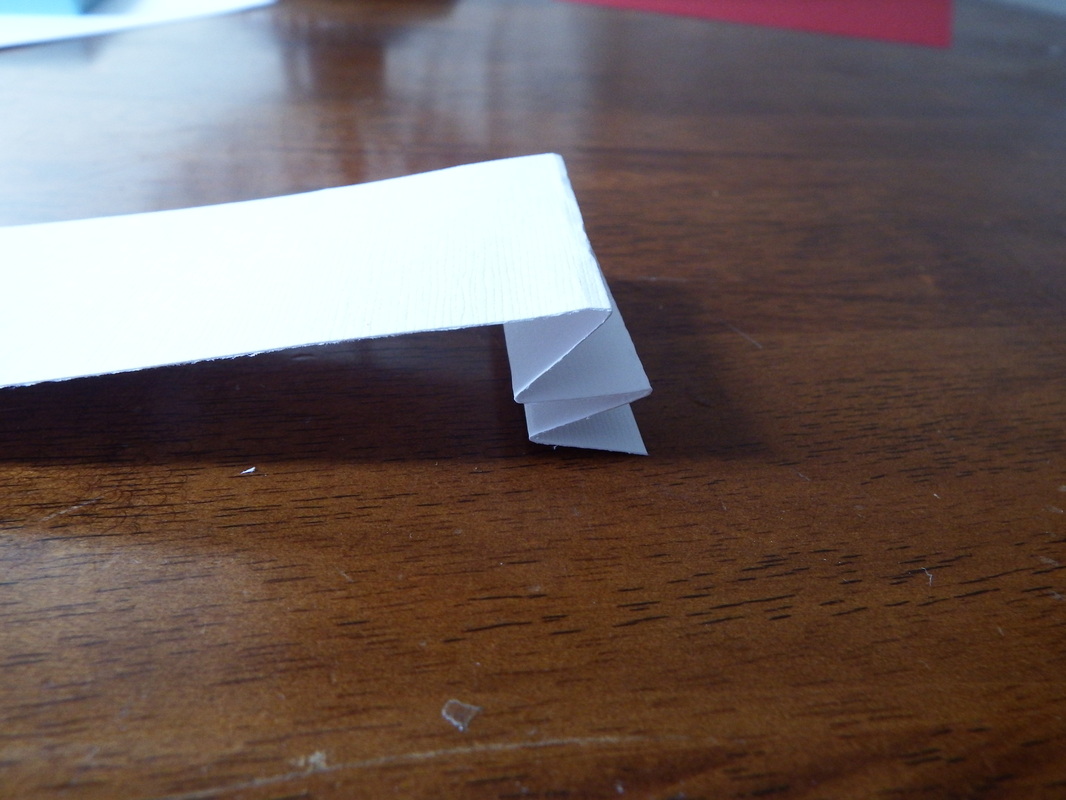
Now, this is the part where those childhood paper-folding skills come in handy. Remember accordion folding paper for no reason as a child? Maybe that was just me? Well, you are going to accordion fold this strip of paper approximately every half inch. It does not have to be perfect; just try to keep it as straight as possible, all the way to the end.
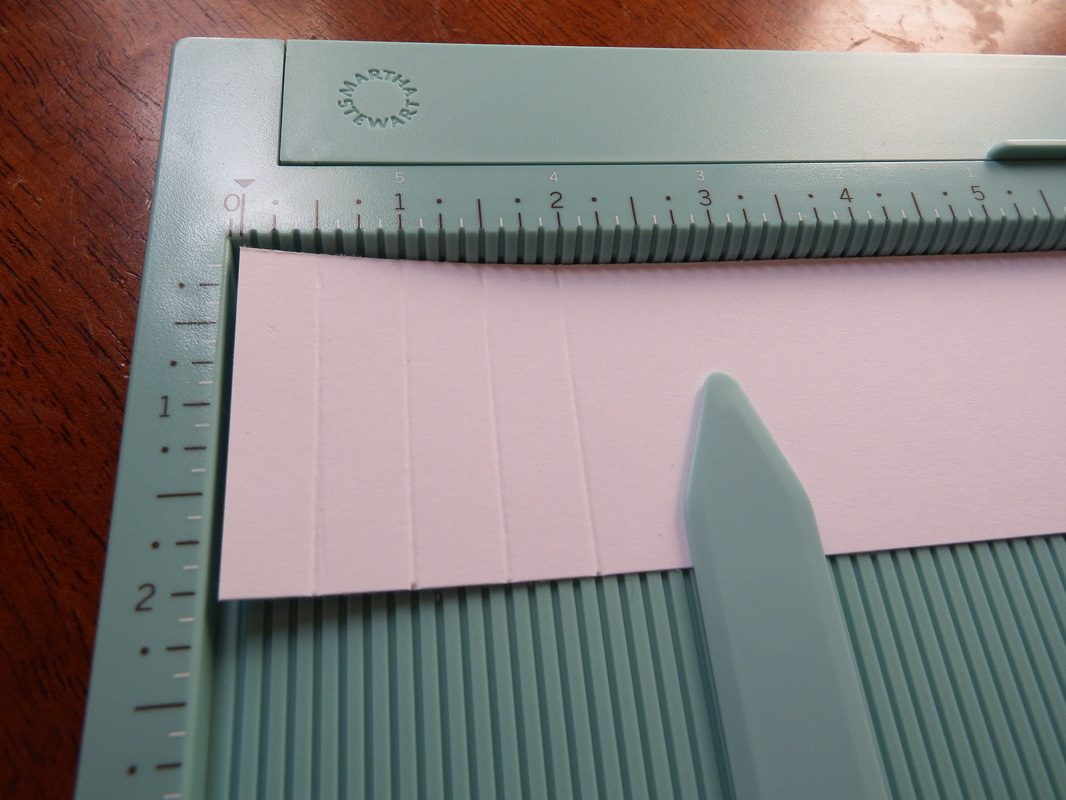
If you have a scoring board, go ahead and get some use out of it and score every half inch. This can also be done on your paper trimmer with a scoring blade, or simply running a bone folder in the cutting depression every half inch. I'm a little bit OCD and love to have the perfect scores every half inch so I did mine this way. You can laugh, it's ok...I'm good with that.
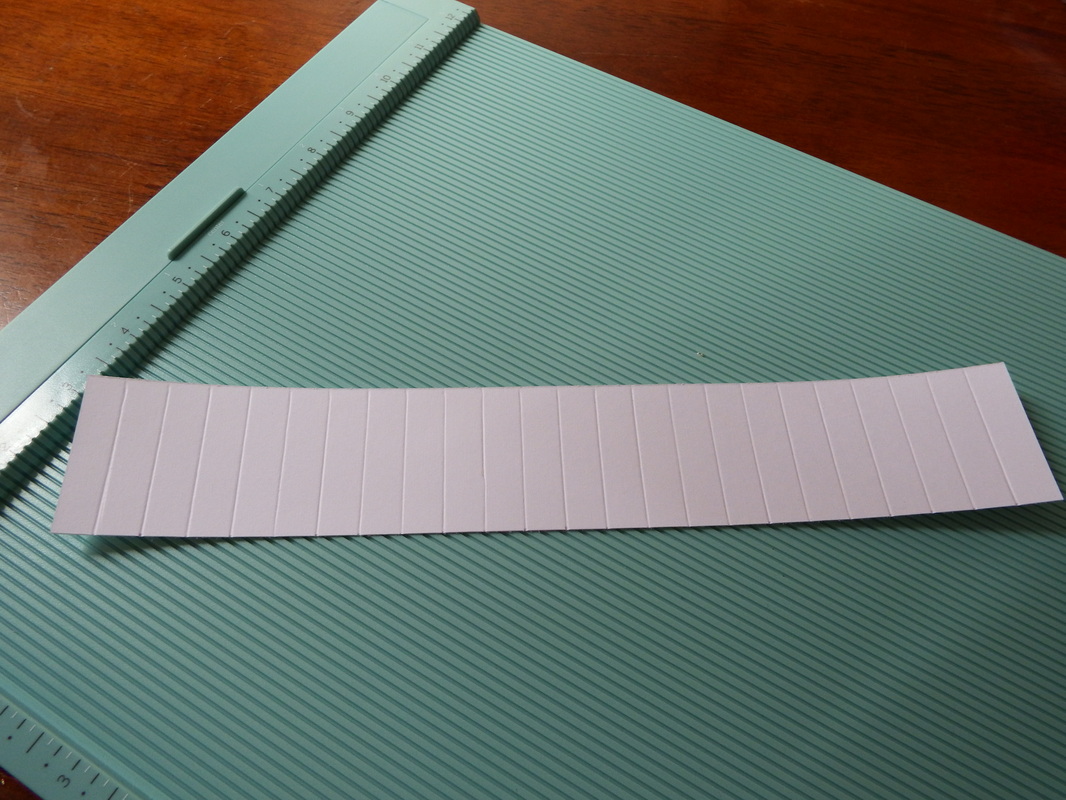
If you choose to score your piece, it should look like this. Now, accordion fold your paper along the score lines.
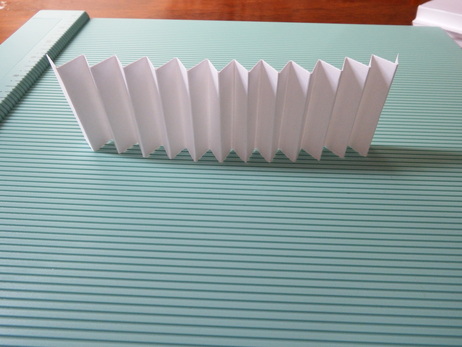
Now, apply your adhesive to the inside of two ends and stick together, making sure that they are glued in towards the inside of the circle like pictured above. Make sure you do this, or you will go through several of these suckers wondering why your rosette won't lay flat....it will be because there is not an even amount of folds. Not that I would know or anything....cough cough.....
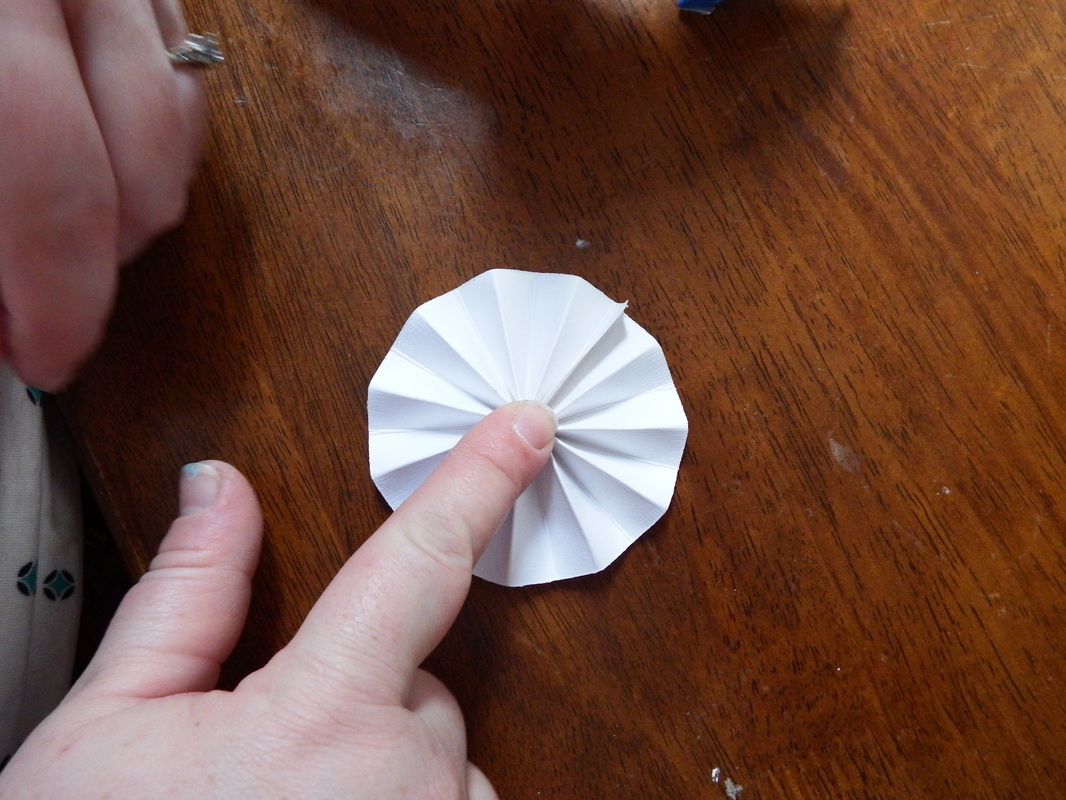
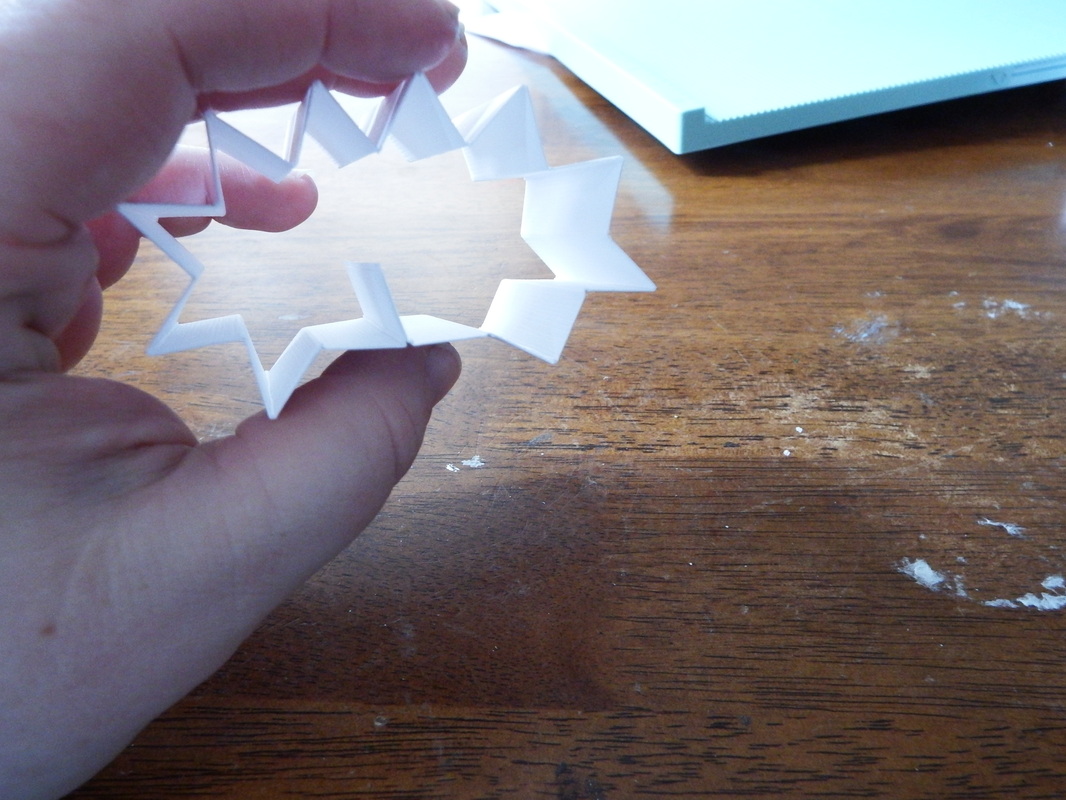
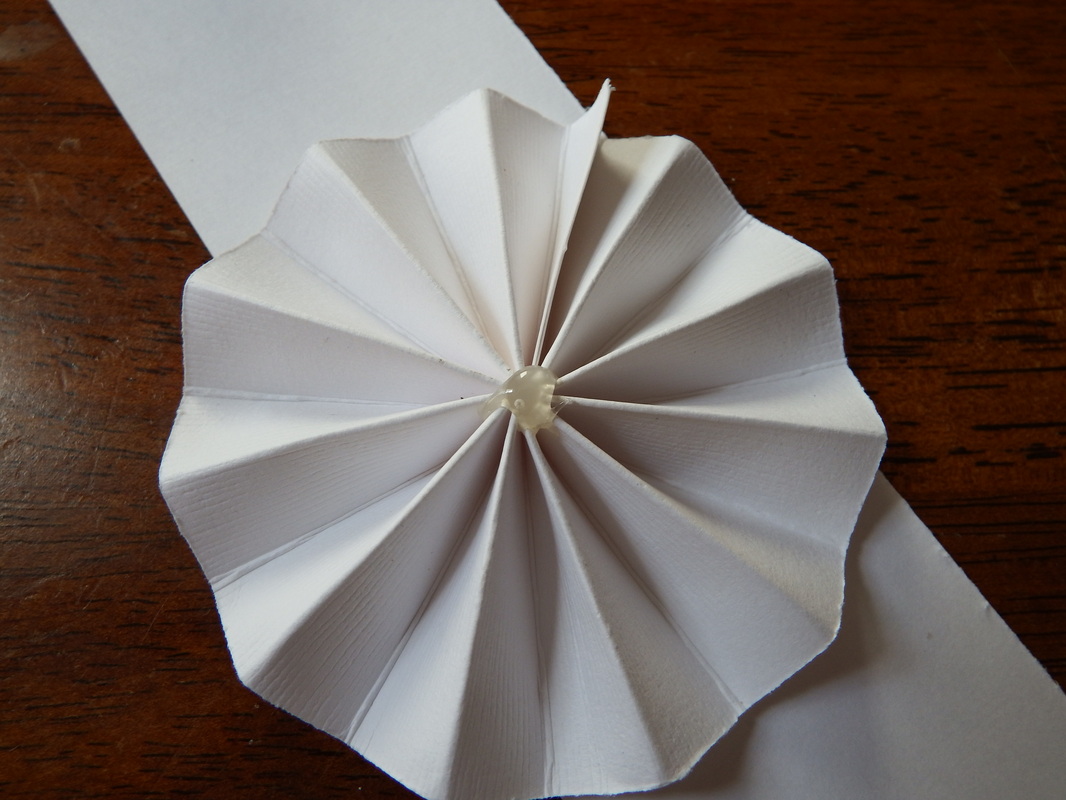
Now, stand your sort-of circle up, gather the points toward the middle and push gently so that the rosette lays flat. Go ahead and put a generous amount of glue (I think hot glue works best, but any liquid glue should do the trick). If you are going to put a circle or small embellishment on top, don't fuss over the glue! No one is going to see under it!
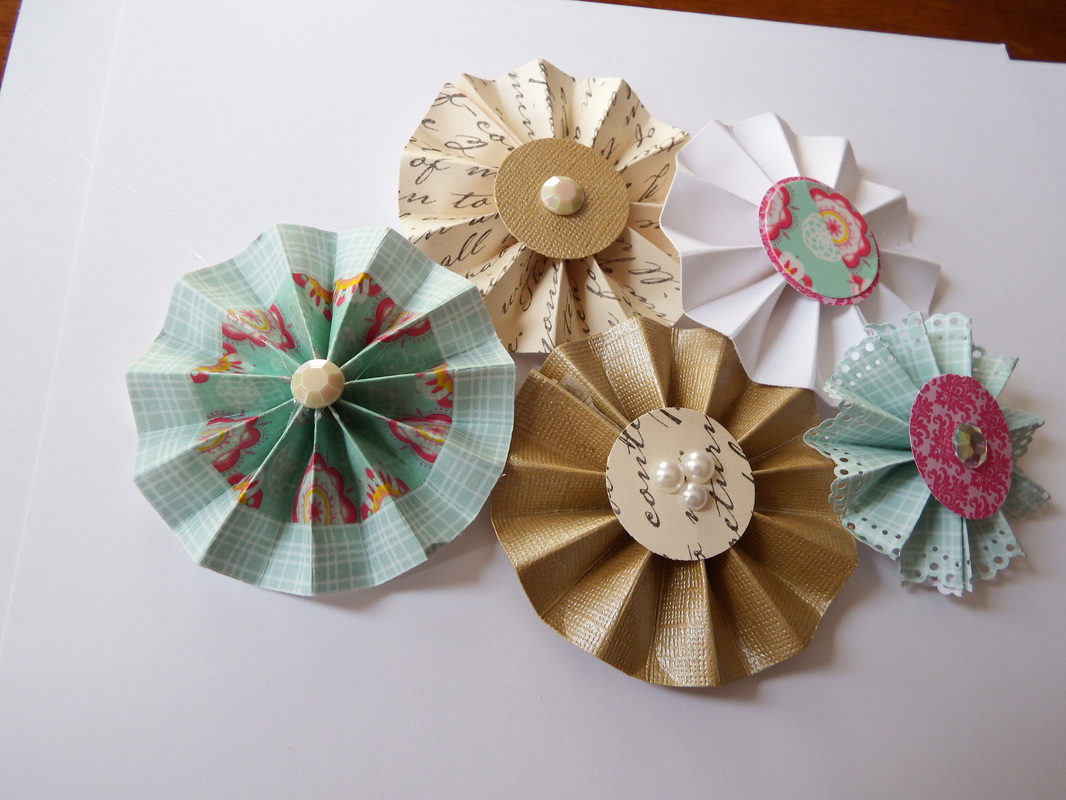
Your rosette is essentially finished, it's up to you to decide how to decorate it. Here are some of my ideas on making them more personalized!
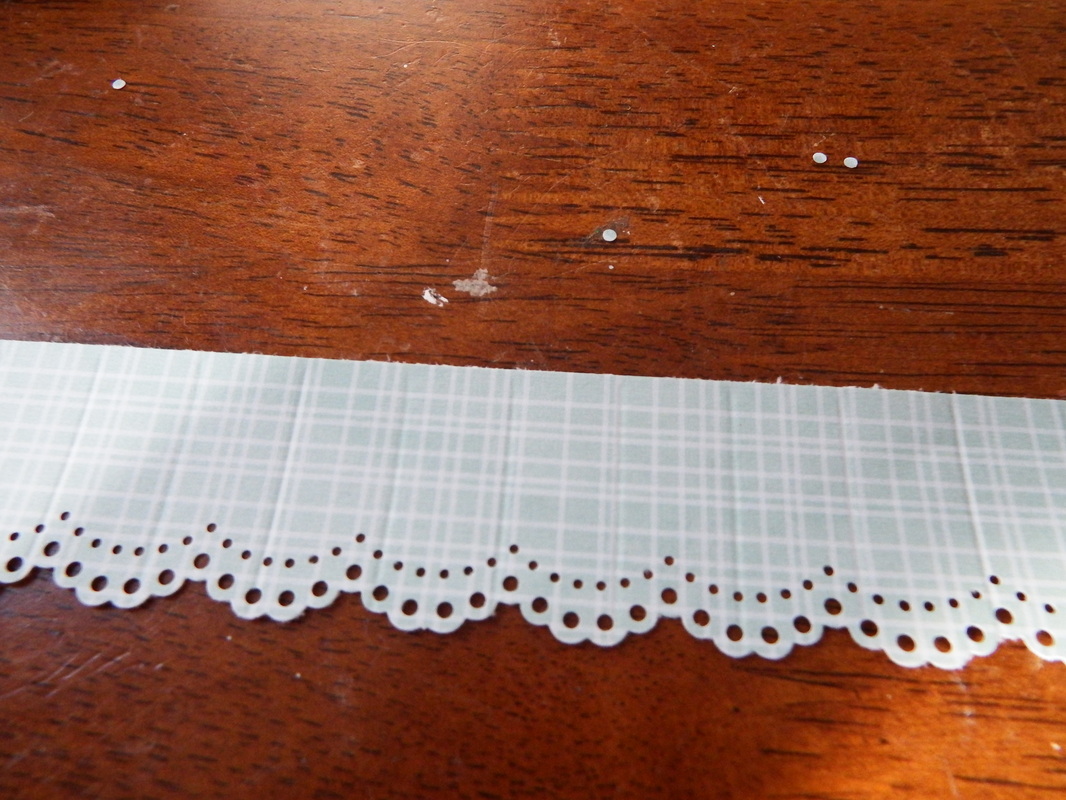
To make the lace-edged rosette, I used the Martha Stewart lace edge punch then scored it as I would for any other one. Just be careful not to push too hard and rip through the lace edge. Also keep in mind that this punch does take off a small portion of edge, making your rosette smaller in diameter.
To add more personality to your rosettes, try experimenting with different color combos, textures and prints. To use washi tape, simply stick down your tape the entire length of your paper strip and score and fold as you would normally.
These were super easy to make and quite cheap. These are also a great way to use up any long scraps you may have left over. I plan on using these on cards and scrapbook pages but their uses are endless. They would make great wall decor, party decor, add a ribbon and you have a party favor!
These were super easy to make and quite cheap. These are also a great way to use up any long scraps you may have left over. I plan on using these on cards and scrapbook pages but their uses are endless. They would make great wall decor, party decor, add a ribbon and you have a party favor!

All finished! Easy peasey lemon squeezey! So, give them a try and be creative, let me see what you've come up with!
As always.....craft on!
As always.....craft on!

 RSS Feed