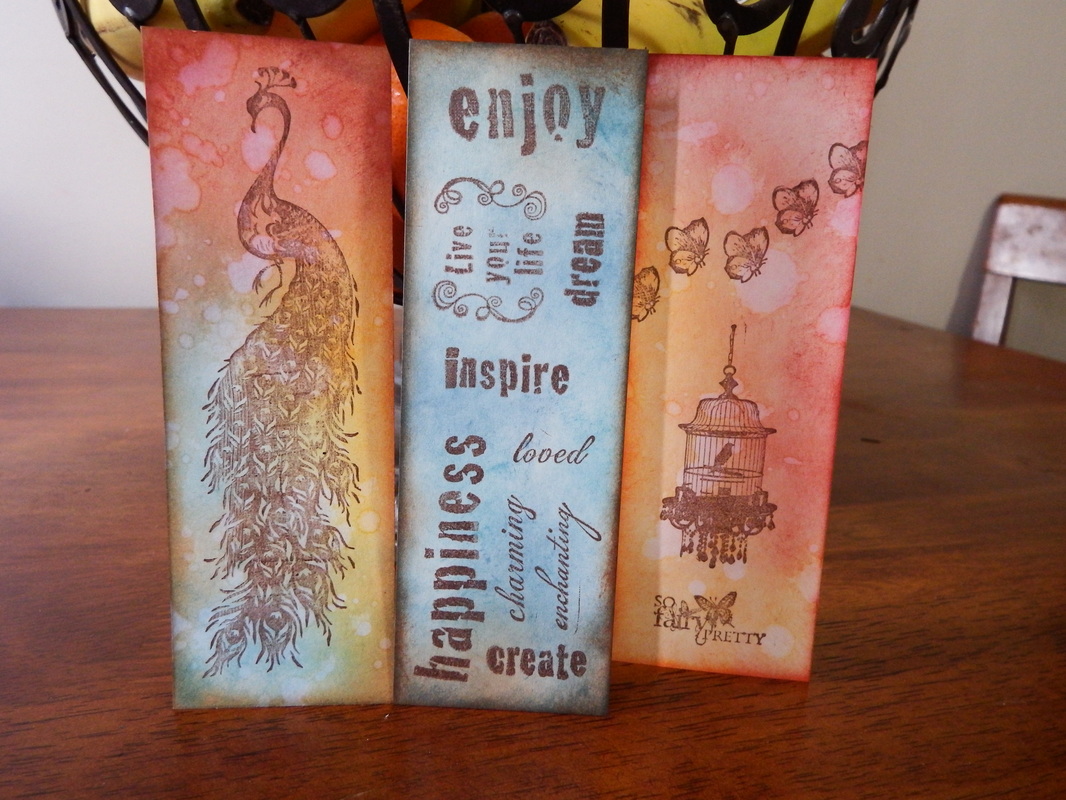
I teach several different classes for paper crafting, but the class and technique that always gets the most attention and comments is the distressing technique. Everyone is always commenting on how good the tags look and how it looks really hard to do. Well, I'm gonna give a quick and shortened version of this class. There are several different versions and techniques that I teach in this class and this is the most basic one. I say basic, but the only thing that is basic is the effort, the results are still very cool! Let's get started!
Supplies you will need to get started:
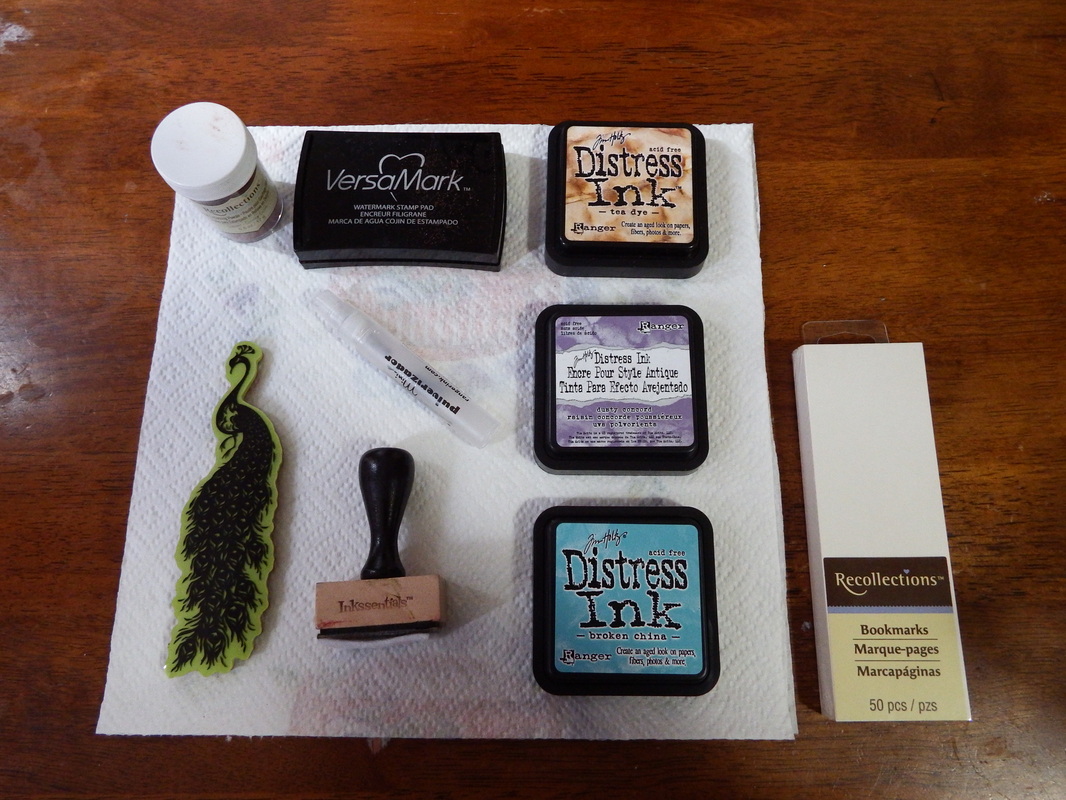
1. 1 package of pre-cut bookmarks, or cardstock cut to approx 2" x 6", in your color of choice. Mine happen to be a manilla/white color.
2. Distress ink in your choice of colors. These are made by Ranger and can be found in most craft stores
3. Distressing dauber with felt pad. These are found in the same location as the ink and come as a package deal.
4. Stamp of your choice. Mine is an acrylic, so I also need an acrylic block. I didn't have one this long, so I used one of my Cuttlebug plates as a stamp block.
Optional Items: (Also pictured)
1 Versa Mark pad for embossing
2. Embossing Powder
3. Embossing Heat Gun
(I was originally going to emboss my peacock in copper, but I realized I left my heat gun at work yesterday, so ink stamping it was!)
4. Mini-mister. You could also use any size spray bottle you have, or just your faucet, this one is COMPLETELY optional.
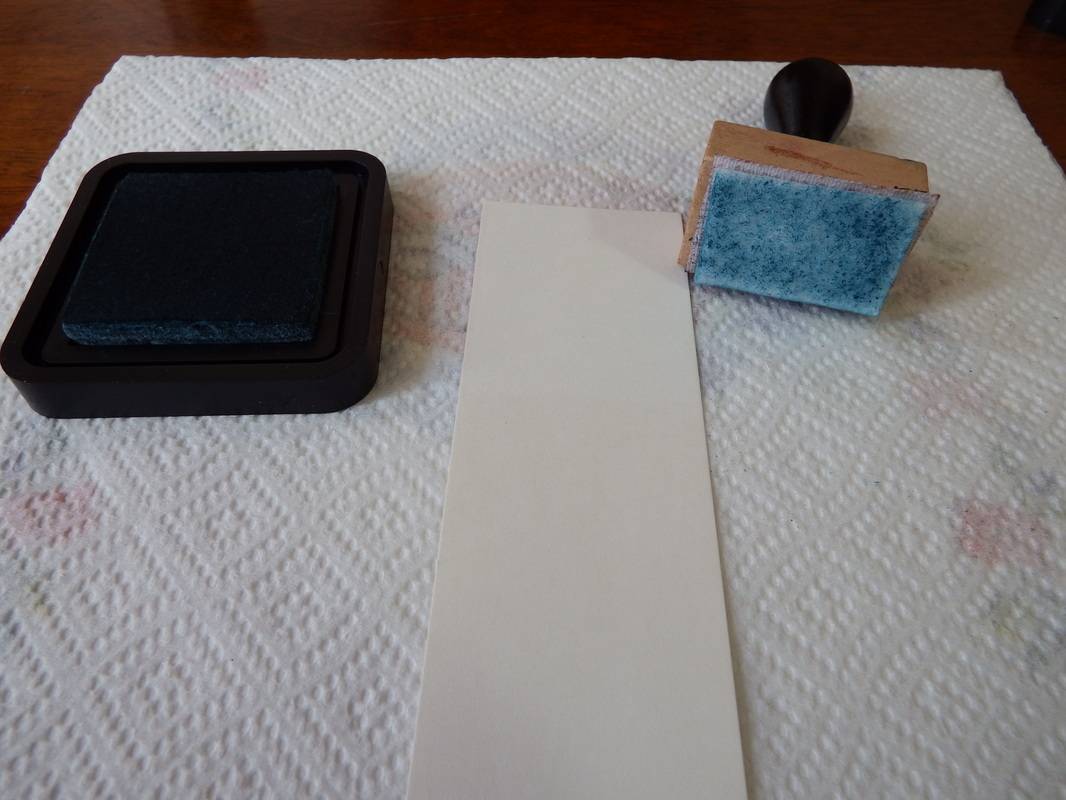
To start, choose your first ink color and go ahead and ink up your felt pad. Once you use your felt pad, you should keep one for every color family. I usually use the same one for all of my shades of blue and purple. Mixing outside of that color family may cause blending resulting and a ugly color.
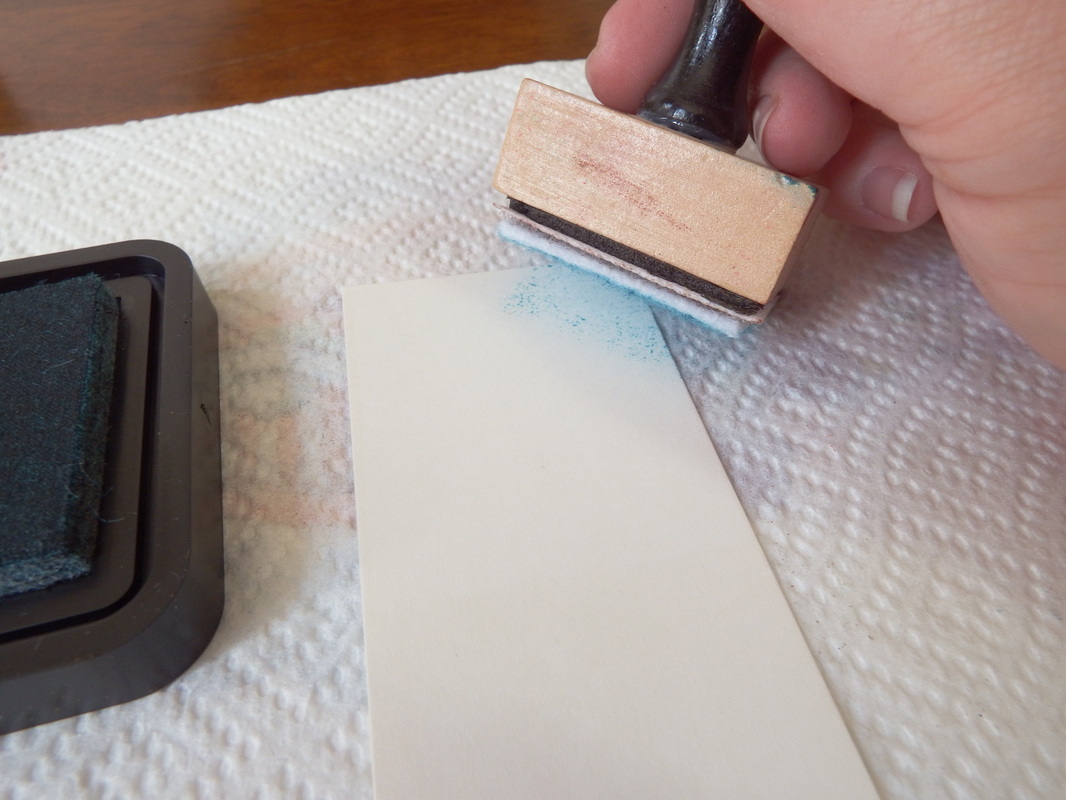
To distress your paper, hold your dauber at an approximate 20 degree angle. You don't want to have it at a 90 degree angle, this will give you rectangle impressions from the shape of your felt pad. LIGHTLY, and I do mean LIGHTLY start sweeping off of the side of your card stock onto it. Make sure that the dauber felt is barely touching the paper. Increase pressure, depending on how dark you want your particular to be in particular places. There is no real wrong way to do this and nothing you make will every be a duplicate with this process.
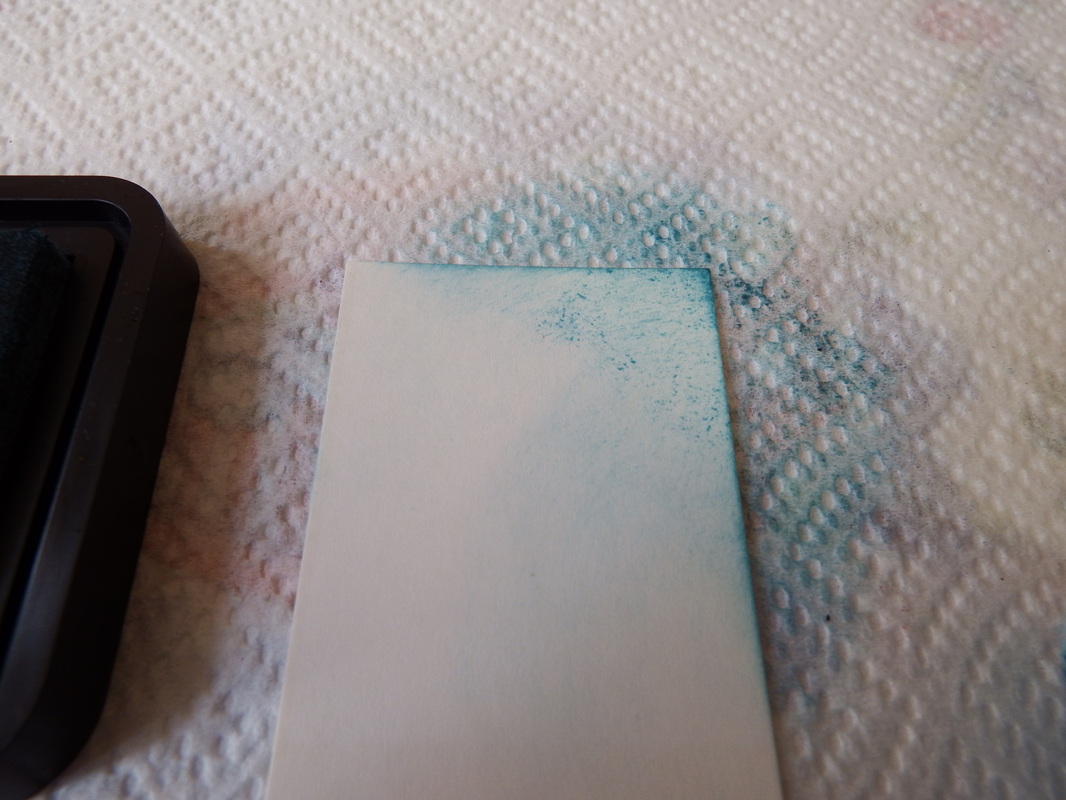
Your bookmark should start to look something like this. Personally, I make all of my colors light, then go back in and add contrasts after all of my base colors are on.
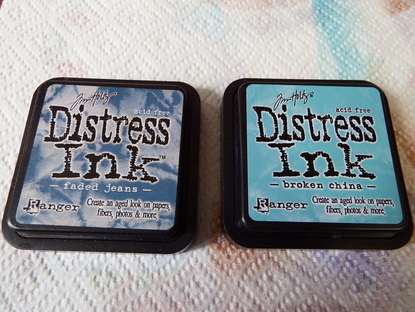
I like to have one darker and one lighter of certain colors. I do this so that I can go in and distress the edges where I have put down the Broken China and edge with Faded Jeans; this gives great contrast and interest.
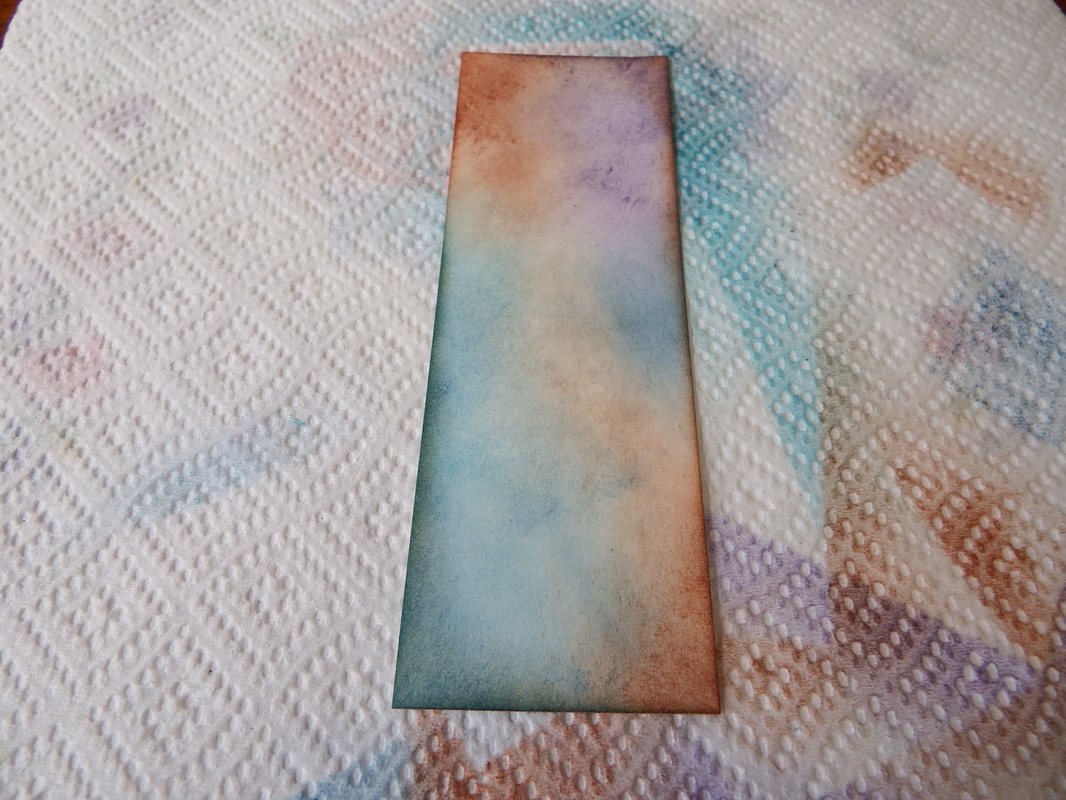
When you've finished applying all of your colors, your tag should look something like this. I like to distress the edges with a darker brown, but I will usually leave that until the end so that I can make sure that I am not going to overpower my image and take interest from the focal point.
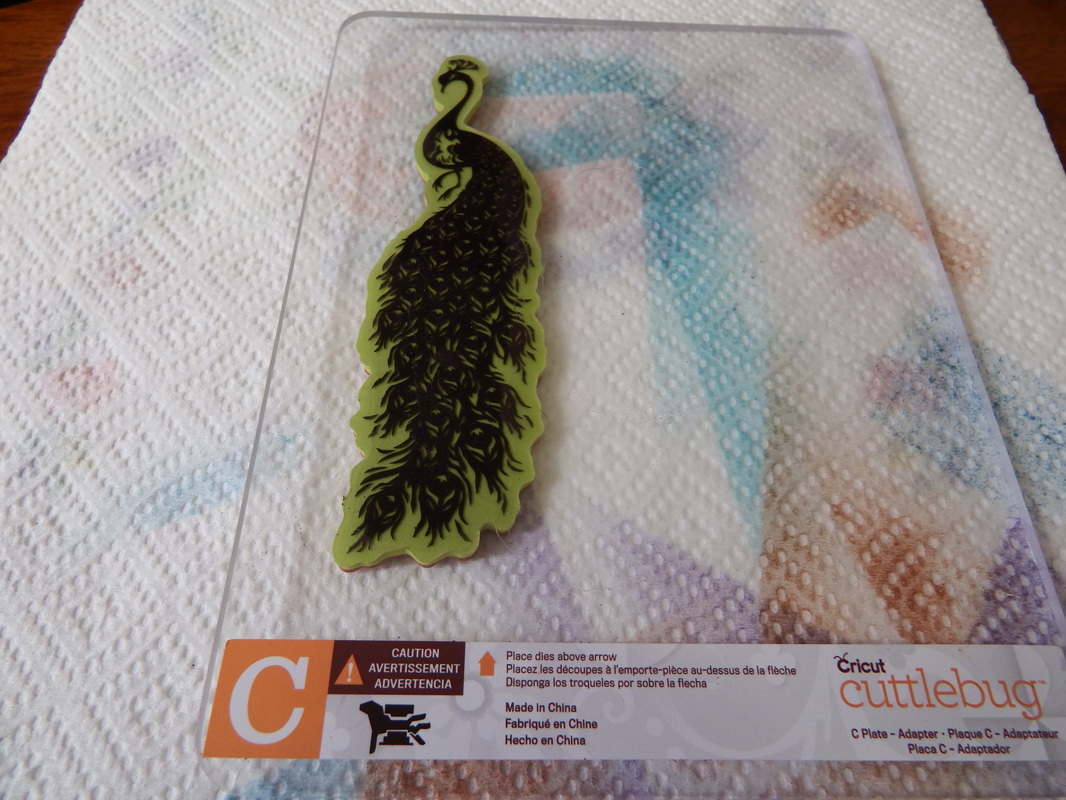
There are two different kinds of stamps. There are wood mounted and acrylic mounted stamps. Wood mounted are obviously mounted on wood and are permanent to their wood block. Acrylic come on a acetate sheet; usually in sets of at least 2 or more, however you can purchase some separately. I really prefer acrylic mounted; they take up less space, and because the acrylic blocks (that are purchased separately) are also clear, you can get a better idea of your positioning. They also take up MUCH less space...which is nice for people like me who have a teeny-tiny house!
Like I was saying in the intro, I had to mount this stamp on a Cuttlebug plate because it was too long to fit on any blocks that I have. Go ahead and ink that sucker up and stamp where you want your image on your bookmark.
Like I was saying in the intro, I had to mount this stamp on a Cuttlebug plate because it was too long to fit on any blocks that I have. Go ahead and ink that sucker up and stamp where you want your image on your bookmark.
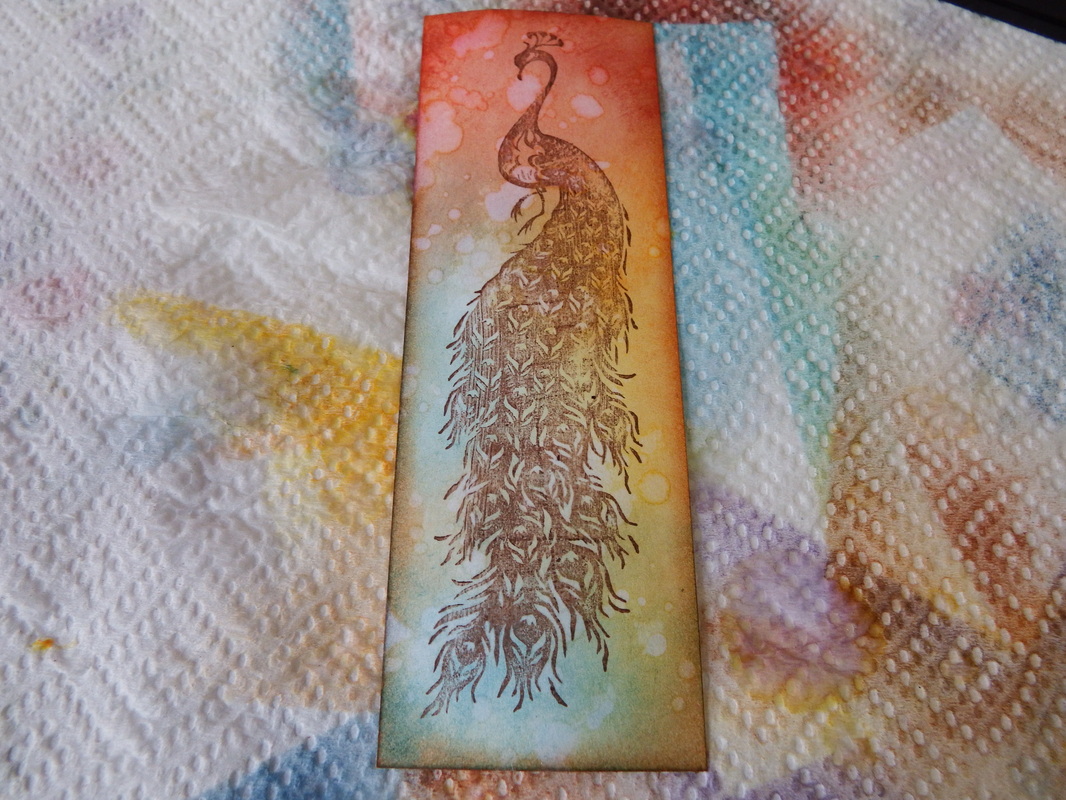
After you've stamped your image, go ahead and put a small amount of water in the palm of your hand and flick it on your bookmark. The longer you allow the water to sit; the more prominent your splatter marks will be. When you take the water off, just put a piece of paper towel on the surface and blot it off. Avoid wiping it, as it will smear the ink...unless you are going for that look. Like I said, there is no wrong way to do this. You just need to find out what your style is and what you like doing.
That's it! Not hard at all! These are a fast and simple project to take on that allows you to learn the technique. These make great gifts, too!
When I get my heat gun back this week, I will do this in copper and post a pic. Copper embossing powder is my absolute favorite color to use; I think it looks great with the distressed look.

Play around with colors, stamps and techniques...you may come up with something that you like better! It's so much fun, and this technique is truly addicting; I do this more that I ever thought I would.
So, don't be intimidated and get started today!
And always...craft on!
So, don't be intimidated and get started today!
And always...craft on!

 RSS Feed