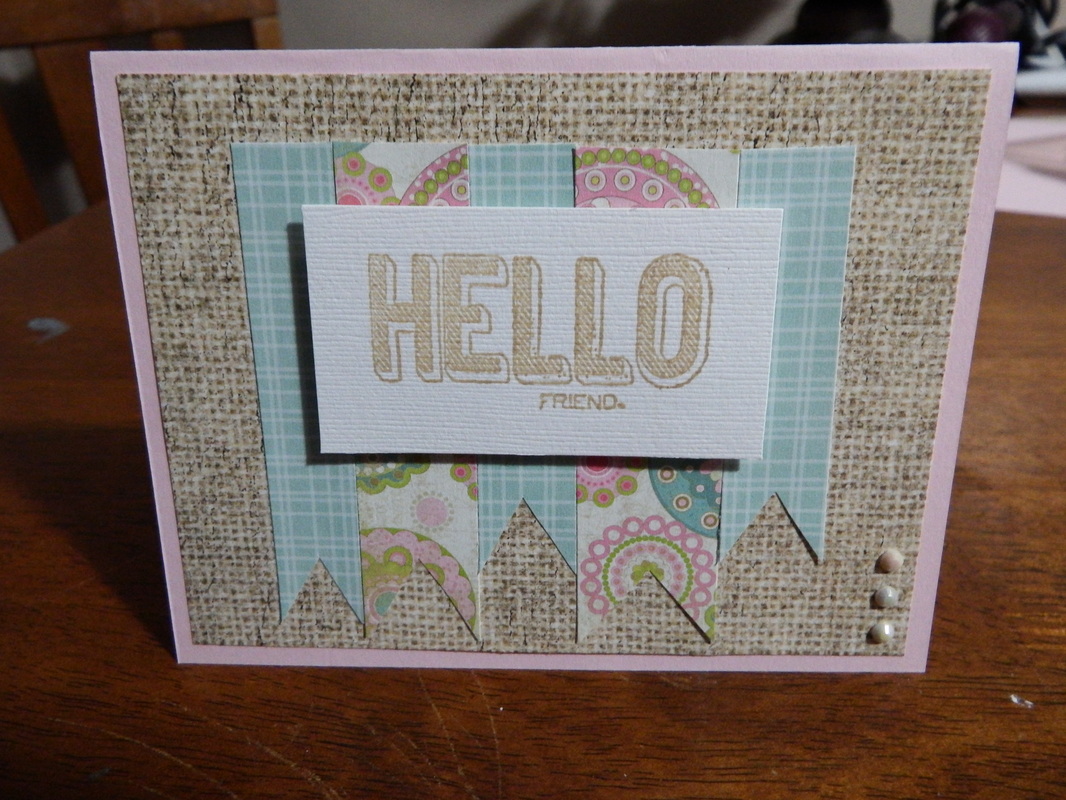
It's Sunday...the day before Monday. I hope that everyone is having a great weekend and enjoying the nice weather (at least in my area). Spring seems to have decided to show itself and is my inspiration for this easy card. I was able to do this card in less than 15 minute...from design to finish. This card is a great beginner card as it has very little necessities and also a great template to use when you need a card in a hurry!
As always; the necessities:
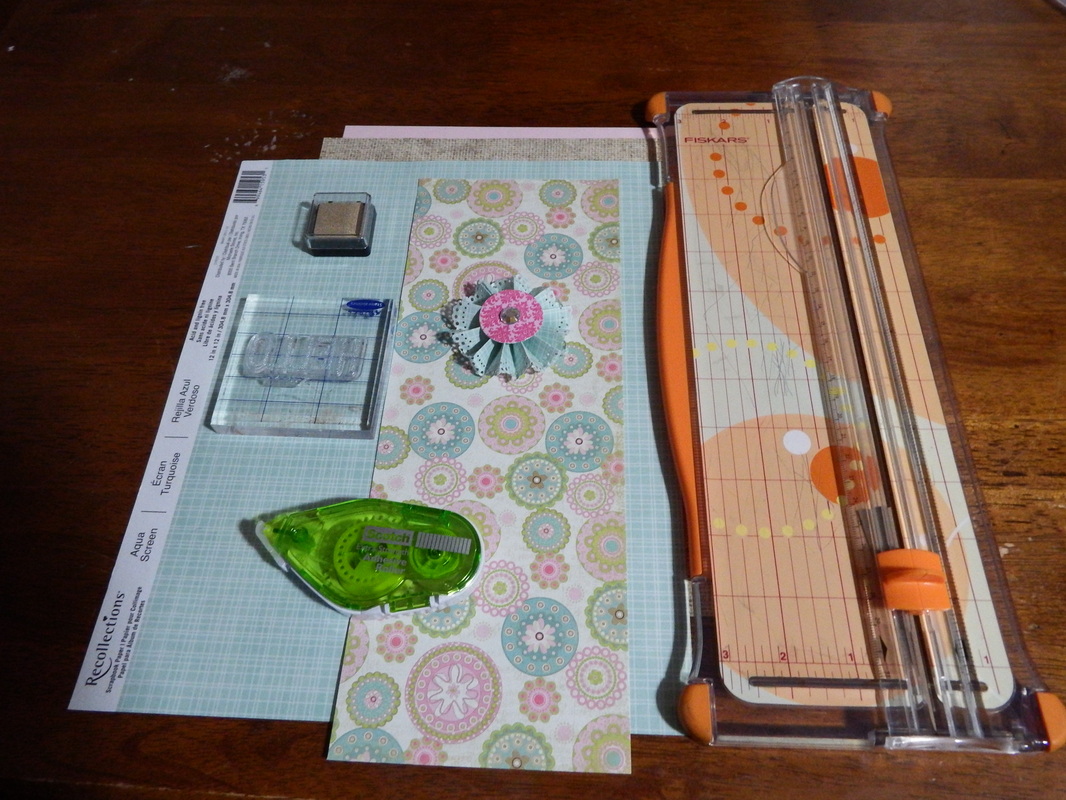
1. 12" paper trimmer
2. 1 piece of 8.5" x 11" cardstock of your choice
3. Matching scrapbook paper or cardstock of your choice ( I used 3)
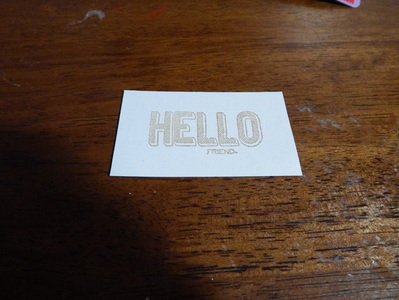
4. Sentiment stamp and ink pad
5. Adhesive of your choice. I recently starting using this strong extra strong bond adhesive by Scotch and I love it!
*Pictured is a rosette from a previous tutorial that I thought I was going to use, but decided to use 3 small rhinestones instead*
1. 12" paper trimmer
2. 1 piece of 8.5" x 11" cardstock of your choice
3. Matching scrapbook paper or cardstock of your choice ( I used 3)
4. Sentiment stamp and ink pad
5. Adhesive of your choice. I recently starting using this strong extra strong bond adhesive by Scotch and I love it!
*Pictured is a rosette from a previous tutorial that I thought I was going to use, but decided to use 3 small rhinestones instead*
Step 1:
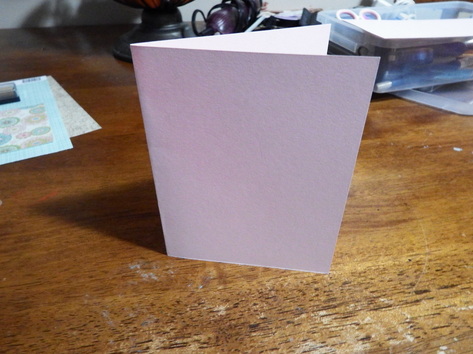
Cut cardstock in half (at 5 1/2") and fold in half so that you have a card base. I like to use a bone folder to get a nice crisp edge, but that is completely optional, just helps with my incessant need for perfection!
Cut cardstock in half (at 5 1/2") and fold in half so that you have a card base. I like to use a bone folder to get a nice crisp edge, but that is completely optional, just helps with my incessant need for perfection!
Step 2:
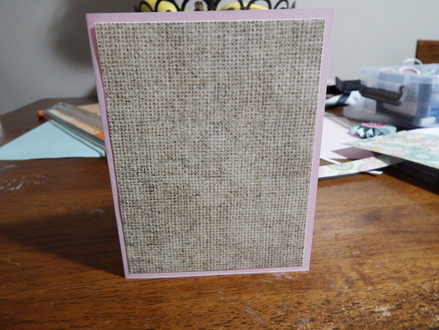
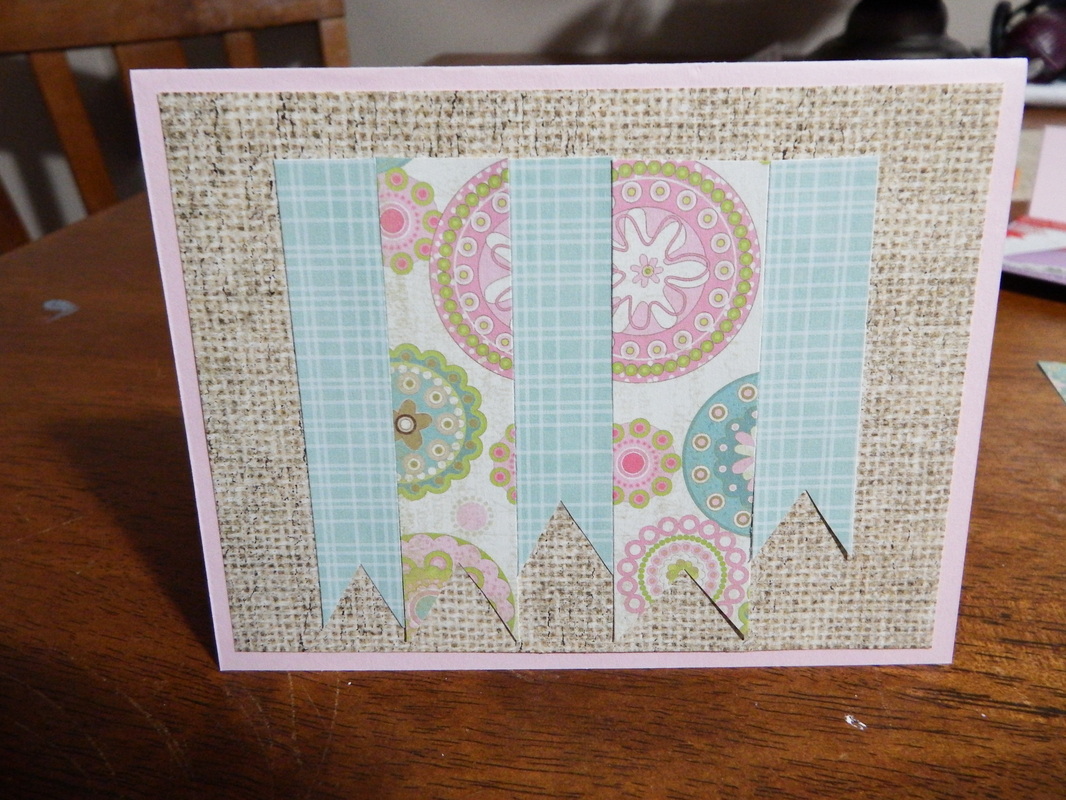
Cut your mat piece so that it is a 1/4" smaller than the base. If you are using the same size card as mine, you will need to cut it to 4" x 5 1/4". Adhere paper to your base, making sure that all of your edges are showing equally.
Cut your mat piece so that it is a 1/4" smaller than the base. If you are using the same size card as mine, you will need to cut it to 4" x 5 1/4". Adhere paper to your base, making sure that all of your edges are showing equally.
Step 3:
Go ahead and ink up your stamp. I prefer to use clear acrylic-mount stamps rather than wood-mounted simply for ease of use. I can easily line up where I want to stamp without too much guesswork. These wonderful creations have saved me a LOT of re-stamping. I suggest clear-mounts when you can; especially if you are new crafter.
Go ahead and ink up your stamp. I prefer to use clear acrylic-mount stamps rather than wood-mounted simply for ease of use. I can easily line up where I want to stamp without too much guesswork. These wonderful creations have saved me a LOT of re-stamping. I suggest clear-mounts when you can; especially if you are new crafter.
Step 4:
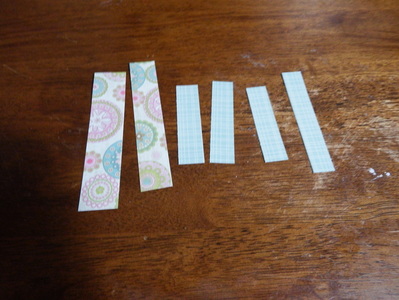
With your trimmer; cut 4-6 strips of paper of various lengths and width from your matching paper. It doesn't have to be exact. After you have cut them, go ahead and cut the dovetails into the bottom of each strip. Place banners on your card. You may have to play around with the placing a few times until you find something you like.
With your trimmer; cut 4-6 strips of paper of various lengths and width from your matching paper. It doesn't have to be exact. After you have cut them, go ahead and cut the dovetails into the bottom of each strip. Place banners on your card. You may have to play around with the placing a few times until you find something you like.
Step 5:
After you're happy with the placement of your banners; go ahead and adhere them to your card. I did mine one at a time, leaving the next one so that I could more easily see where they were supposed to go. I aligned the top of my banners, but leaving them asymmetrical would be fine too!
After you're happy with the placement of your banners; go ahead and adhere them to your card. I did mine one at a time, leaving the next one so that I could more easily see where they were supposed to go. I aligned the top of my banners, but leaving them asymmetrical would be fine too!
Final step:
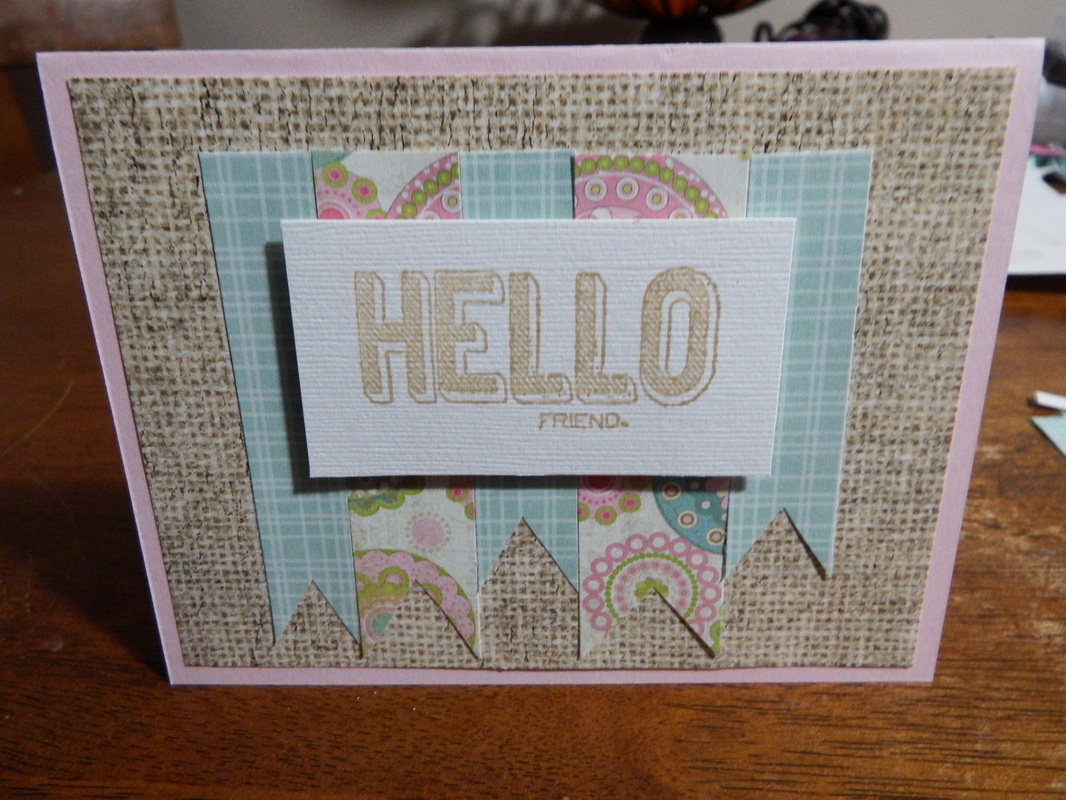
Using foam dimensional tabs, adhere your sentiment over your banners. I use these a lot! Many times, you can turn a boring, simple card into something more interesting just by giving your card some dept; creating interest. They are in packs of 50 or more for just a few bucks! I recommend these especially if you are new and lost for ideas!
So, that's it! Easy peasey!
Well, I hope you all found this helpful and I hope to see what you've created soon! Until Wednesday...
Craft on!

 RSS Feed