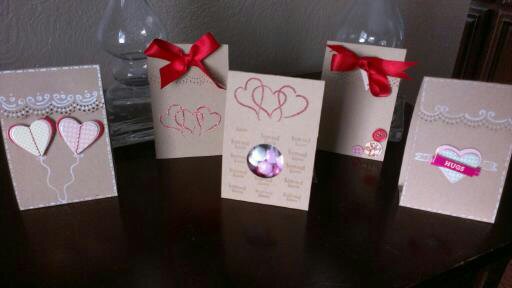
Valentine's Day is almost here! In fact it's just days away. While I was brainstorming this week's craft, I figured that almost everyone likes and probably receives some kind of candy for the holiday. So, it got me thinking...Who wants to go out and buy the same ole boring heart shaped candy box when you can make your own personalized candy gifts? Don't be afraid...they are easy and you can make a bunch of them up in under an hour. Ok, let's get started!
Before you begin, you will need a few basic supplies. If you do any type of paper crafting or scrapbooking, then chances are you will have most; if not all of them on hand.
Before you begin, you will need a few basic supplies. If you do any type of paper crafting or scrapbooking, then chances are you will have most; if not all of them on hand.
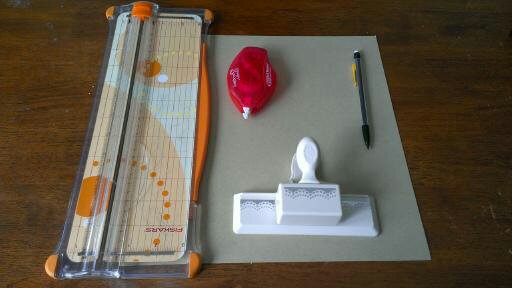
The supplies that are must haves:
~At least 1 piece of 12"x12" cardstock (1 piece makes 4 boxes, so plan accordingly... I used kraft color)
~Adhesive...I used scrapbooking adhesive because that is what I am comfortable with. If all you have is Elmer's glue, then use it. Bottom line, use what you're comfortable with and/or have around your house.
~1 border punch of your choice ( I used a doily print one from the Martha Stewart line of punches).
~Stapler (not pictured)
~Paper trimmer with a scoring blade. Tip: I could not find mine so I used a mechanical pencil with no lead, worked just fine!
~Cello treat sacks (found in any candy/cake decorating aisle) The size I used was 4"x3".
~Candy of choice ( I used Valentine M&M's)
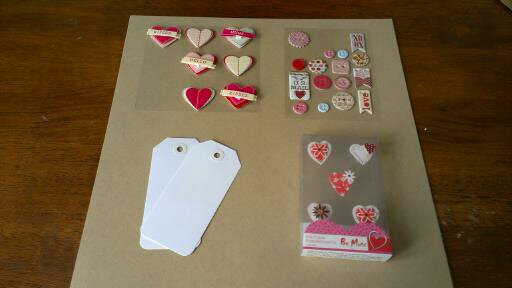
Now; the extras...Find what you would like to decorate your boxes with. I used a variety of Valentine embellishments and a white opaque marker. This is an excellent way to use up any extra embellishments you may have laying around from other projects!
Below are some suggestions:
~At least 1 piece of 12"x12" cardstock (1 piece makes 4 boxes, so plan accordingly... I used kraft color)
~Adhesive...I used scrapbooking adhesive because that is what I am comfortable with. If all you have is Elmer's glue, then use it. Bottom line, use what you're comfortable with and/or have around your house.
~1 border punch of your choice ( I used a doily print one from the Martha Stewart line of punches).
~Stapler (not pictured)
~Paper trimmer with a scoring blade. Tip: I could not find mine so I used a mechanical pencil with no lead, worked just fine!
~Cello treat sacks (found in any candy/cake decorating aisle) The size I used was 4"x3".
~Candy of choice ( I used Valentine M&M's)
Now; the extras...Find what you would like to decorate your boxes with. I used a variety of Valentine embellishments and a white opaque marker. This is an excellent way to use up any extra embellishments you may have laying around from other projects!
Below are some suggestions:
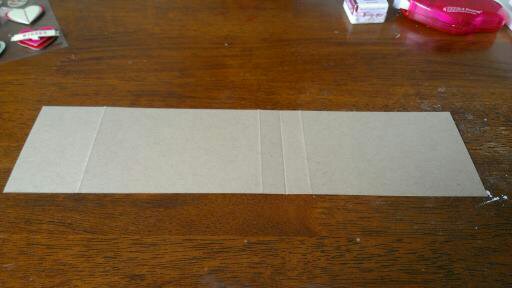
Ok, first you are going to want to cut your card stock into four pieces, finished pieces will measure 3"x12" Then take your first piece of cut cardstock in your trimmer. You are going to want to score your first spot at 4 1/2".
To score, simply slide your scoring blade (or mechanical pencil, in my case) along the groove where the blade would normally cut. The purpose of scoring is to create indentations where you will be folding your box at. Keep moving your cardstock to the right, and make your second score line at 5 3/4". The last score should be made at 10 1/4"
Now, this is critical to making your box fold right...FLIP over your card stock and make your last score at approx 5 1/8". This should put it in the middle of the first two scores. Flipping over your cardstock may seem unimportant, but if you don't, your box will have a rounded bottom instead of one that will support it to allow it to stand upright.
This is what your cardstock should look like after you done all of your scoring. I know this seems time consuming, but after you do one, you will fly through anymore that decide to do. It took me several..ok, a ton of wasted cardstock to get these measurements right...
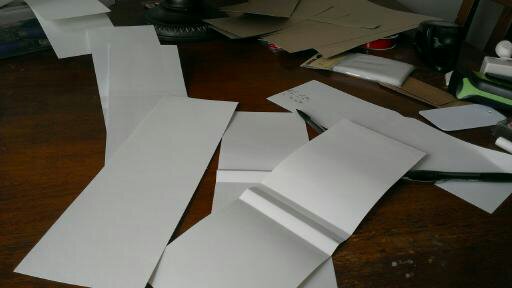
Definitely a work in progress here. Yes, all of those are would-be boxes that I started while trying to get the measurements perfect. But the hard part is done, all you have to do is follow directions! :)
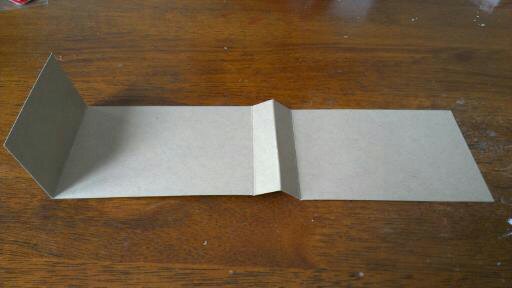
Now, it's time to make your folds along your score marks. Above is what your box should look like at this point.
Next, you're going to put the end that is on the far left of the above photo in your border punch of choice. If you've never used a border punch; they are super easy. First put the end in, making sure your cardstock is all the way against the back wall of the punch and push down, making the first punch. Now, move it over; making sure that the already punched area lines up with the pattern on the sides of the punch. See below:
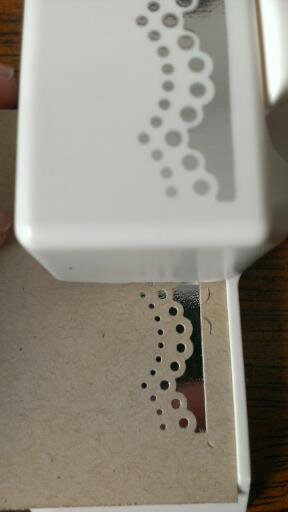
When you only see silver behind your punched image, go ahead and make the second punch. Keep repeating this until you have stamped all the way across the lid of your box.
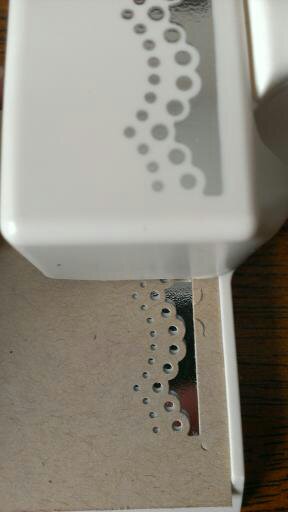
Here you can see the difference between lined up and not properly lined up. You only want to see the silver before you make another punch.
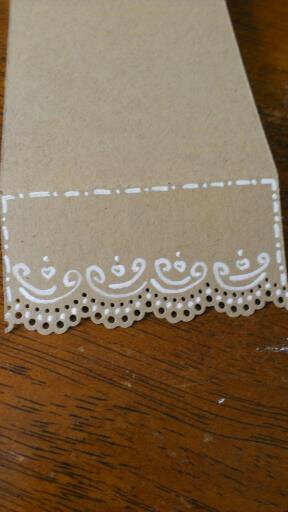
Now, the fun part...time to embellish your treat box! Here, I used my white opaque marker to make some fun little doodles around the punch design. (Keep in mind which side will be the front) Have fun with it! You can even have your kids decorate them! The possibilities are literally endless. These boxes can be customized for any colors, occasions, etc. These would cute for baby showers, birthday parties, classroom treats. The great that about paper crafting is that card stock is made in EVERY shade of color and print, so have fun. I chose a kraft colored paper, but a printed one would be fun, and also less embellishments would be needed. Don't feel that you need to only use my colors or designs, the fun is in making it your own! Any hoo...
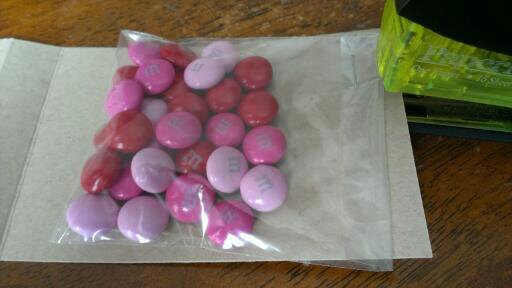
So, after you have decorated your box, you will fill up your cello bags with your chosen candy. Don't overfill them! If you do, they will be hard to staple down and the weight may be more than your box can handle, causing them to tip over.
So, after you have decorated your box, you will fill up your cello bags with your chosen candy. Don't overfill them! If you do, they will be hard to staple down and the weight may be more than your box can handle, causing them to tip over.
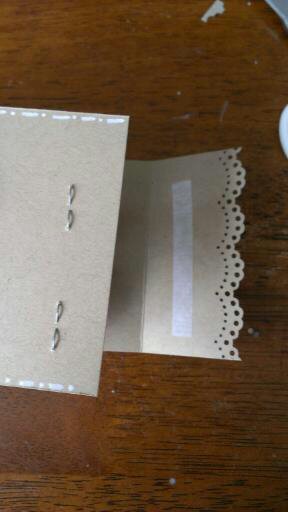
After you've filled your treat sacks, fold over the edge and staple them on the inside, right near the top. Don't worry, as long as you staple them close to the top, the front flap will conceal the staples.
Lastly, you're going to apply your adhesive and fold over flap and apply pressure. If you're using glue; make sure you apply pressure long enough that your flap stays sealed.
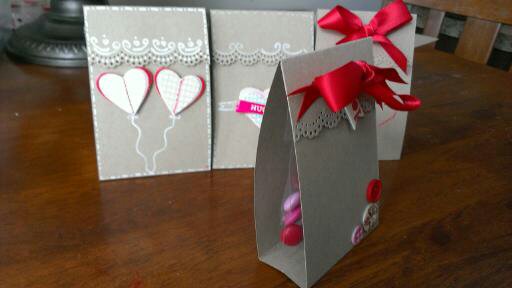
And.....ta-daaaa! (insert roaring applause) You're done! Not so bad, was it?
I just love giving handmade gifts! Just try it once, the feeling you get is amazing!
As always, I would love to see what you all come up with. So post some pictures of what you've done! Happy Valentine's Day!
Craft on!
I just love giving handmade gifts! Just try it once, the feeling you get is amazing!
As always, I would love to see what you all come up with. So post some pictures of what you've done! Happy Valentine's Day!
Craft on!

 RSS Feed