It is true that time does fly when you're having fun! I can't believe that we are already at the second-to-last card in the countdown. I really hope that everyone has enjoyed looking at all of my designs and that I've been able to inspire at least one person. This is another card that breaks me out of my usual card routine. I'm not normally a fan of gold but I notice a lot of it in trends this year. Take inspiration from things around you, such as fashion, pinterest...almost everywhere! I bought this stamp set and I wasn't sure what I was going to do with it; I tried coloring it and wasn't happy with the results and then it hit me out of the blue today...gold!
My Metallic Holiday Card also reminds us of something that can be overlooked many times....the inside of the card! I chose to do only design on the outside and stamp my sentiment in the same gold emboss on the inside rather than outside. This is a great way to put something on the inside and not have to worry about what to write. Just stamp, sign and go! Well, let's get to it!
How to make this card:
1. Cut your white cardstock base and fold.
2. Cut your gold metallic cardstock and mat with white cardstock. Adhere these to your base. Using thin, gold ribbon, wind around the middle of your matted section several times. Spread out your ribbon that goes the sides and gather in the middle. This will give your ribbon less of a bunched up appearance and more the effect of a bow.
3. Stamp your image with Versamark and heat emboss with gold embossing powder. Cut around image with very sharp scissors. Adhere image to card using foam adhesive dots.
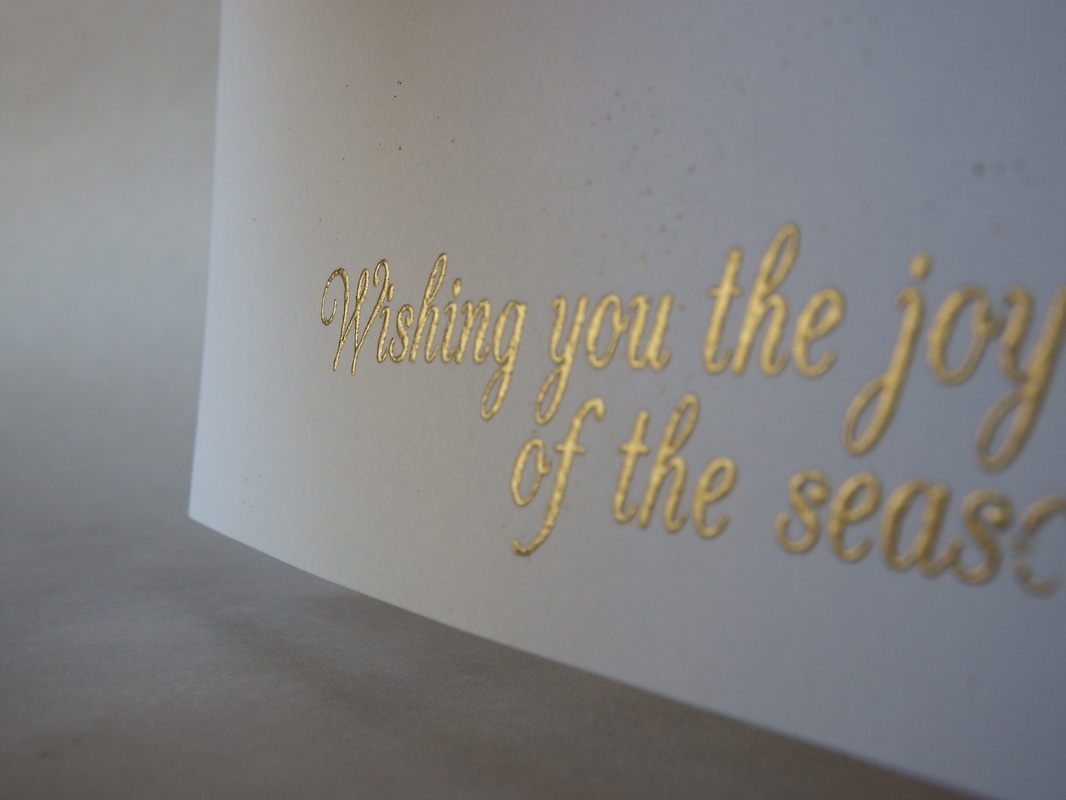
4. To finish off your card; stamp your sentiment on the inside using Versamark and heat emboss with gold embossing powder. I chose to stamp mine in the bottom corner. Who says that it always has to be in the middle? But place yours where your little heart sees fit.
My Metallic Holiday Card also reminds us of something that can be overlooked many times....the inside of the card! I chose to do only design on the outside and stamp my sentiment in the same gold emboss on the inside rather than outside. This is a great way to put something on the inside and not have to worry about what to write. Just stamp, sign and go! Well, let's get to it!
How to make this card:
1. Cut your white cardstock base and fold.
2. Cut your gold metallic cardstock and mat with white cardstock. Adhere these to your base. Using thin, gold ribbon, wind around the middle of your matted section several times. Spread out your ribbon that goes the sides and gather in the middle. This will give your ribbon less of a bunched up appearance and more the effect of a bow.
3. Stamp your image with Versamark and heat emboss with gold embossing powder. Cut around image with very sharp scissors. Adhere image to card using foam adhesive dots.
4. To finish off your card; stamp your sentiment on the inside using Versamark and heat emboss with gold embossing powder. I chose to stamp mine in the bottom corner. Who says that it always has to be in the middle? But place yours where your little heart sees fit.
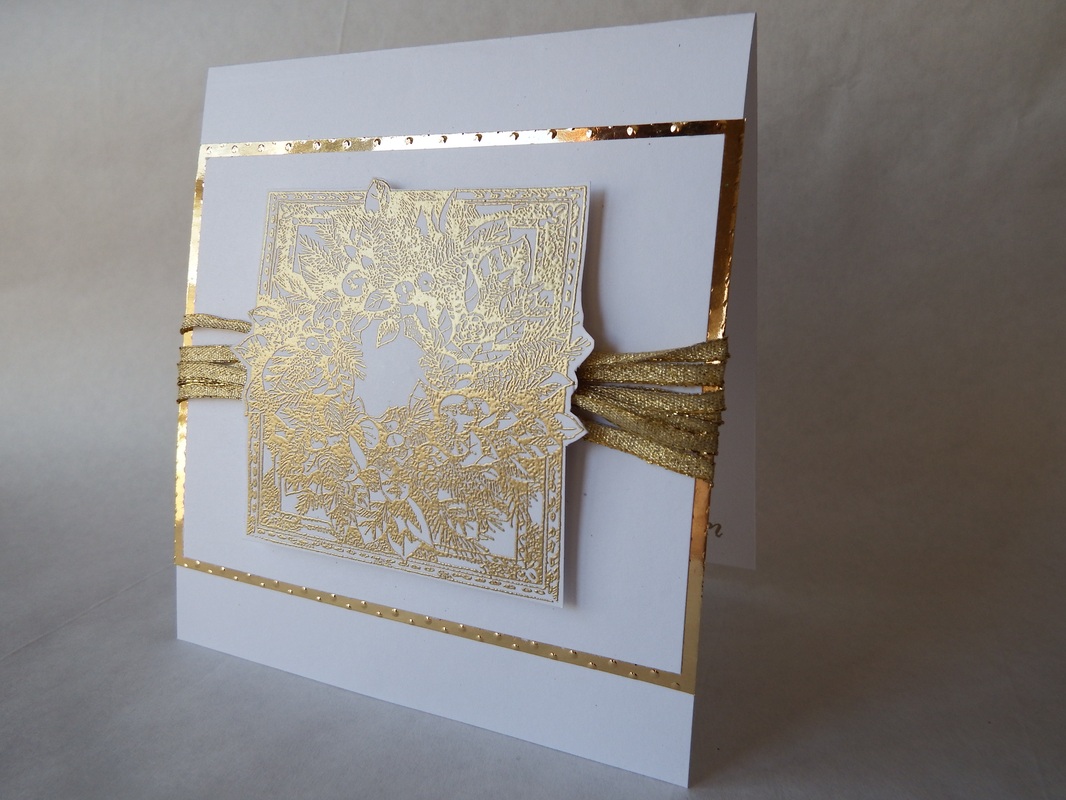
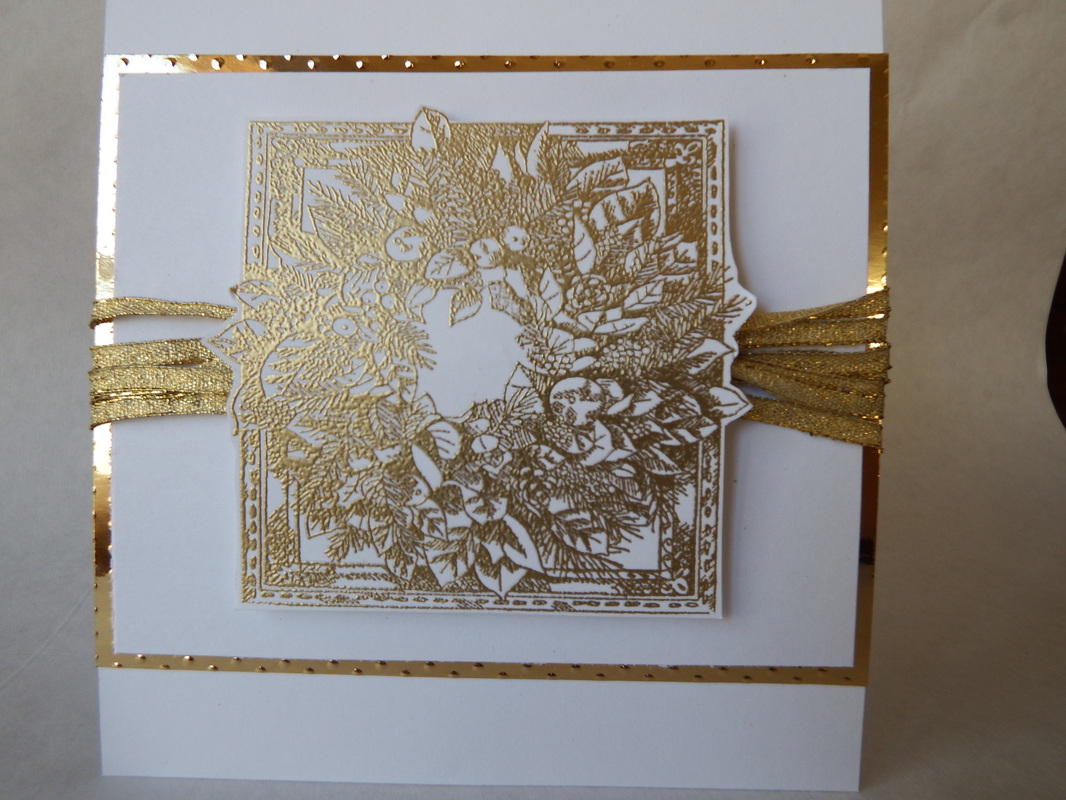
It's hard to get a good picture where you can clearly see the embossed detail, the metallic paper and ribbon all in one shot. The pictures really don't do the card justice but I hope you get the idea! Here's a picture of the embossed sentiment on the inside:
What are your thoughts on gold? It is a color you use often or look for when buying a pre-made card? I don't usually care for gold and almost always go for silver but I think this card turned out great!
Well, tomorrow is the last day of my countdown and I hope to have a great one to send you off to make your own! I'm looking forward to working on it and getting it posted! Leave a comment a feel free to share to others with a passion for paper crafting!
After the countdown is over I'm hoping to get a few projects up for packaging ideas, tags, etc. I did say HOPE....it's a busy season with finals next week, candy to be made and all of the usual hustle and bustle of the holiday season! I look forward to seeing you back tomorrow for our last card of my countdown! Until then...
Craft on!

 RSS Feed