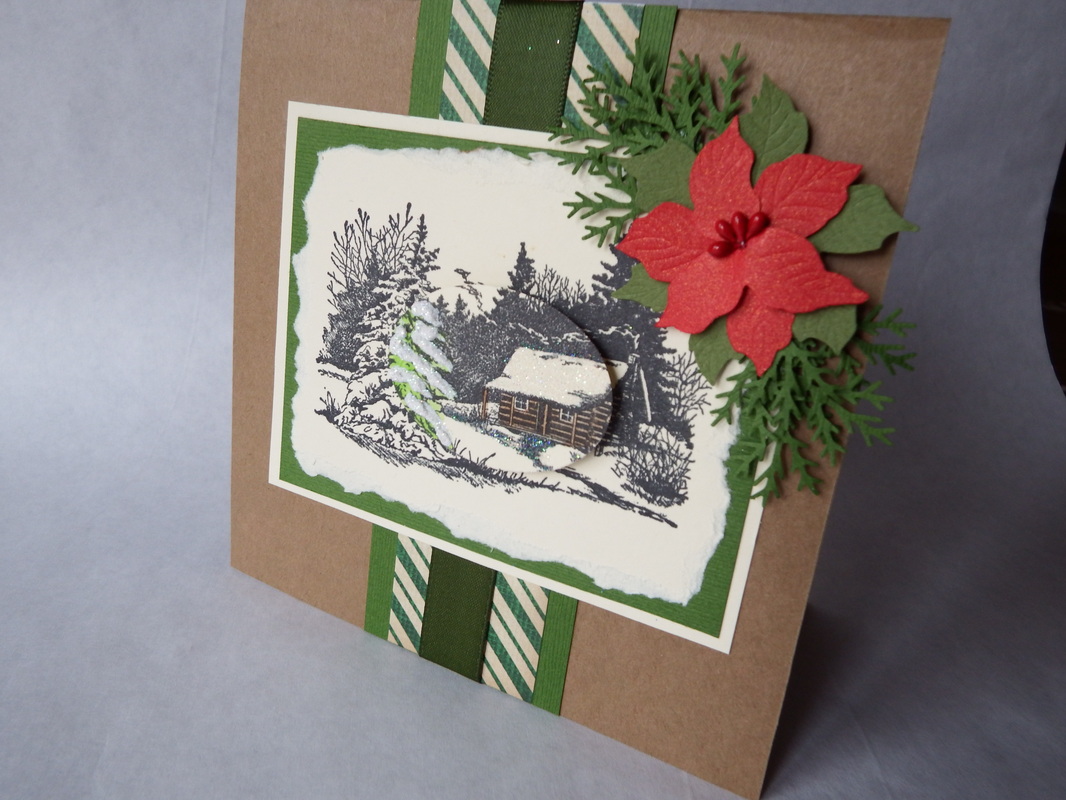
Today's Christmas Card of the day is a card featuring a cabin and winter scene with coloring and 3-D snow added for texture. This technique some of you may know as a form of "spotlighting" that was popular a number of years ago. I wanted to give old life to an older technique and make it relevant for today. This works great if you aren't comfortable with coloring your entire piece or just don't feel like coloring all of it.
Let's not waste anymore time and let me tell you how to make your very own!
1. First, cut out and fold your cardstock base (notice my use of kraft again. Told you I can't get enough of it...and there will definitely be more of it on the remainder of the countdown!). Next, cut a coordinating piece of printed stock or paper and mat it with a solid color, using a piece of matching ribbon over the middle of the two, this should create the nice series of stripes running the length of the card.
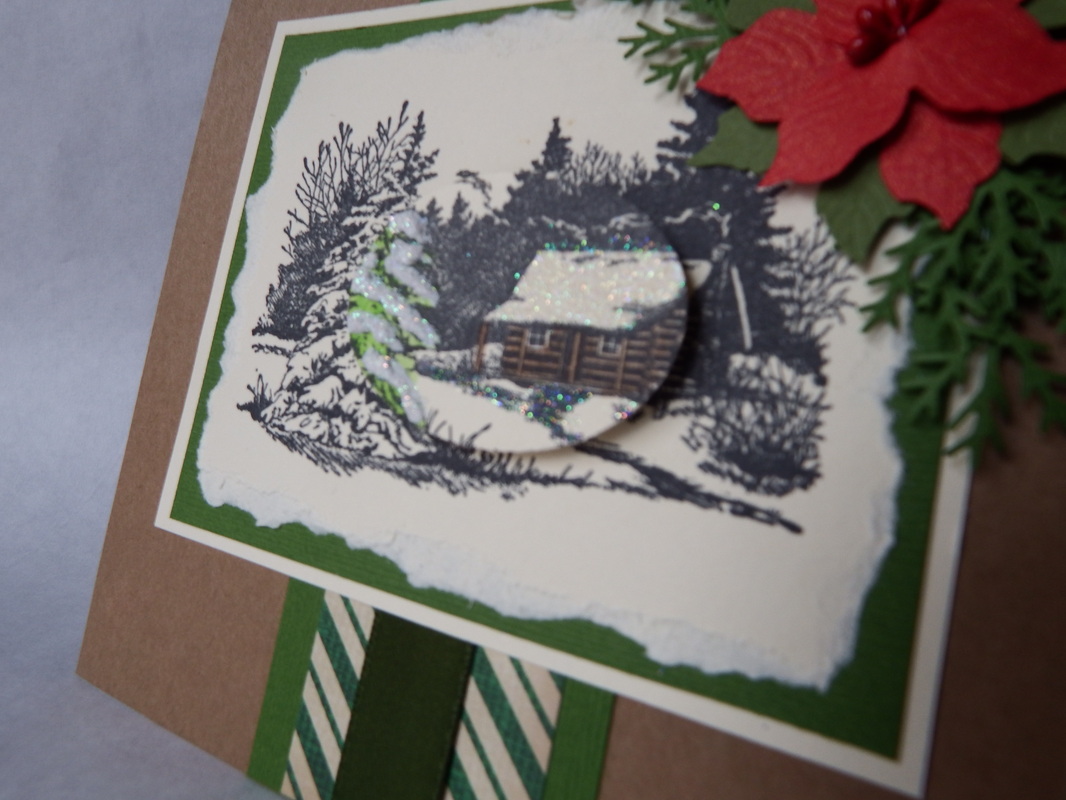
2. Stamp your image on another, lighter piece of coordinating cardstock. One of your images will be the base picture while the other you will need to punch out in a shape of your choice; the section you will be coloring and embellishing.
3. Color your punched scene. For mine, I used water color pencils and a blender pen. Then; using a glue pen, I added glitter to the rooftop of my cabin. Lastly for this part; I added dimensional snow using a product called "Snow Writer". It comes in a small bottle with a very pointed nozzle, allowing you to put it on very precisely. I sprinkled glitter on to my snow before it dried to give it a sparkly look also.
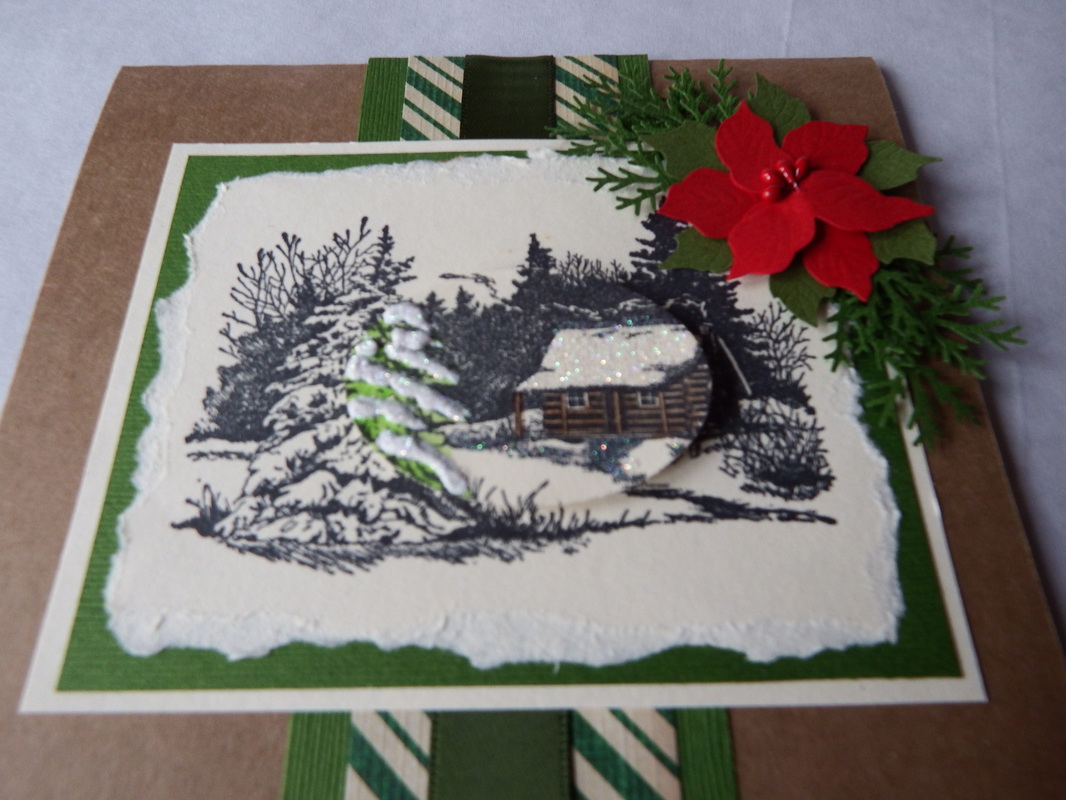
4. Tear or cut out your image and mount it on cardstock and mat again. After you've created all of your matted layers, adhere your embellished, punched image with a foam dimensional dot.
5. To create the poinsettia embellishment, I used one from a set of Jolee's embellishments and punched out the pine branches using the same Martha Stewart punch that we've seen already in use on other cards! Adhere these to the corner of your card and you're done!
Let's not waste anymore time and let me tell you how to make your very own!
1. First, cut out and fold your cardstock base (notice my use of kraft again. Told you I can't get enough of it...and there will definitely be more of it on the remainder of the countdown!). Next, cut a coordinating piece of printed stock or paper and mat it with a solid color, using a piece of matching ribbon over the middle of the two, this should create the nice series of stripes running the length of the card.
2. Stamp your image on another, lighter piece of coordinating cardstock. One of your images will be the base picture while the other you will need to punch out in a shape of your choice; the section you will be coloring and embellishing.
3. Color your punched scene. For mine, I used water color pencils and a blender pen. Then; using a glue pen, I added glitter to the rooftop of my cabin. Lastly for this part; I added dimensional snow using a product called "Snow Writer". It comes in a small bottle with a very pointed nozzle, allowing you to put it on very precisely. I sprinkled glitter on to my snow before it dried to give it a sparkly look also.
4. Tear or cut out your image and mount it on cardstock and mat again. After you've created all of your matted layers, adhere your embellished, punched image with a foam dimensional dot.
5. To create the poinsettia embellishment, I used one from a set of Jolee's embellishments and punched out the pine branches using the same Martha Stewart punch that we've seen already in use on other cards! Adhere these to the corner of your card and you're done!
It was really difficult to get pictures that show the detail in the snow and color but I hope you can get the idea!
So that is card #5! I hope everyone is enjoying seeing them as much as I do making and showing them off! Drop me a line, send me a pigeon, leave a comment, email me, you get the idea! Have an idea or suggestion or a topic that you would like to see? Let me know! Have a technique or topic that you would like a tutorial on? Let me know!
If you know someone that would like to view the 12 Days of Christmas Cards or if you have your own blog; drop me a link so I can check it out!
So as always, and until tomorrow...
Craft on!
If you know someone that would like to view the 12 Days of Christmas Cards or if you have your own blog; drop me a link so I can check it out!
So as always, and until tomorrow...
Craft on!

 RSS Feed