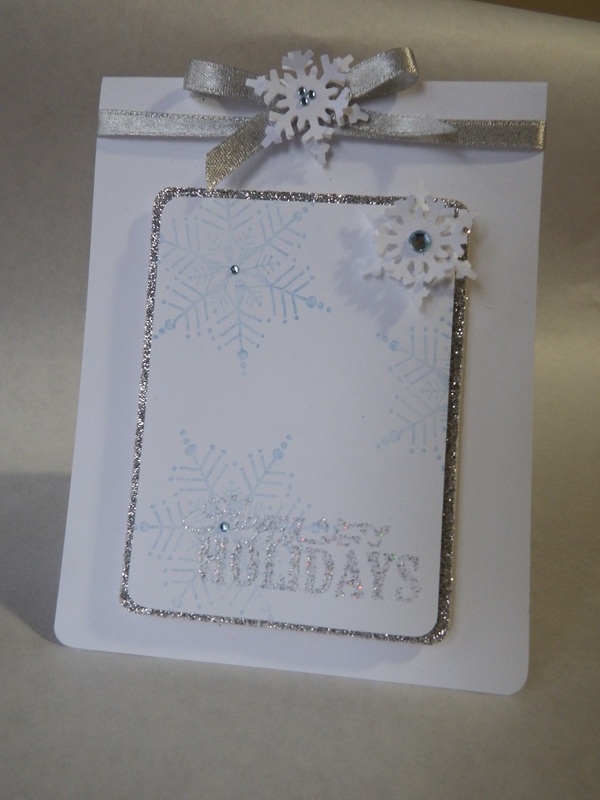
Today's card features a super simple and clean design. This is a great card for a beginner to start their cardmaking adventure. This design only requires two colors of cardstock, 1 color of ink and embossing powder and Versamark if you choose to heat emboss the sentiment.
This card came about from a design I found on Pinterest using just white and silver. I love the simplicity of them and they go great with snowflakes (one of my favorite-est things!). Without further ado...
How to make this card:
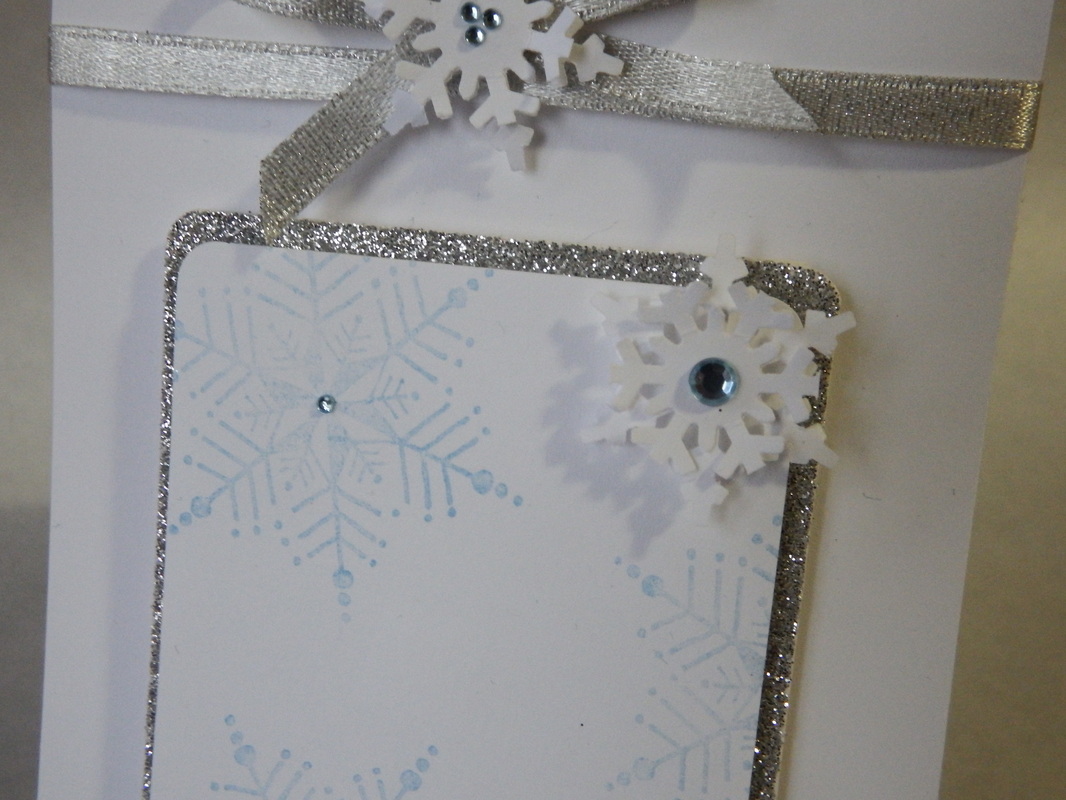
1. Cut your base from white cardstock and create fold. Cut a small section from ribbon and tie around the top of your card; creating a bow.
2. Using a snowflake punch ( I used Martha Stewart's Alpine Snowflake punch) punch at least 2 snowflakes out and place rhinestones in the center of each, set aside for later.
3. Cut a rectangle out of silver glittered cardstock; round the edges, this will be your mat piece. Cut another rectangle out, making sure it's 1/4" small than the silver one; round the edges.
4. Stamp snowflakes in a random pattern on the white cardstock, and place rhinestones in the center of them. If you choose to heat emboss; stamp your sentiment with Versamark then heat embossing powder to create your embossed sentiment.
5. Apply one of your snowflakes to the top of your cardstock using foam dimensional dots. Adhere the white on top of the silver using foam dimensional dots. Adhere the entire matted center piece to the card base also using foam dimensional dots.
6. Lastly, adhere second snowflake to center of bow on the top of the card.
This card came about from a design I found on Pinterest using just white and silver. I love the simplicity of them and they go great with snowflakes (one of my favorite-est things!). Without further ado...
How to make this card:
1. Cut your base from white cardstock and create fold. Cut a small section from ribbon and tie around the top of your card; creating a bow.
2. Using a snowflake punch ( I used Martha Stewart's Alpine Snowflake punch) punch at least 2 snowflakes out and place rhinestones in the center of each, set aside for later.
3. Cut a rectangle out of silver glittered cardstock; round the edges, this will be your mat piece. Cut another rectangle out, making sure it's 1/4" small than the silver one; round the edges.
4. Stamp snowflakes in a random pattern on the white cardstock, and place rhinestones in the center of them. If you choose to heat emboss; stamp your sentiment with Versamark then heat embossing powder to create your embossed sentiment.
5. Apply one of your snowflakes to the top of your cardstock using foam dimensional dots. Adhere the white on top of the silver using foam dimensional dots. Adhere the entire matted center piece to the card base also using foam dimensional dots.
6. Lastly, adhere second snowflake to center of bow on the top of the card.
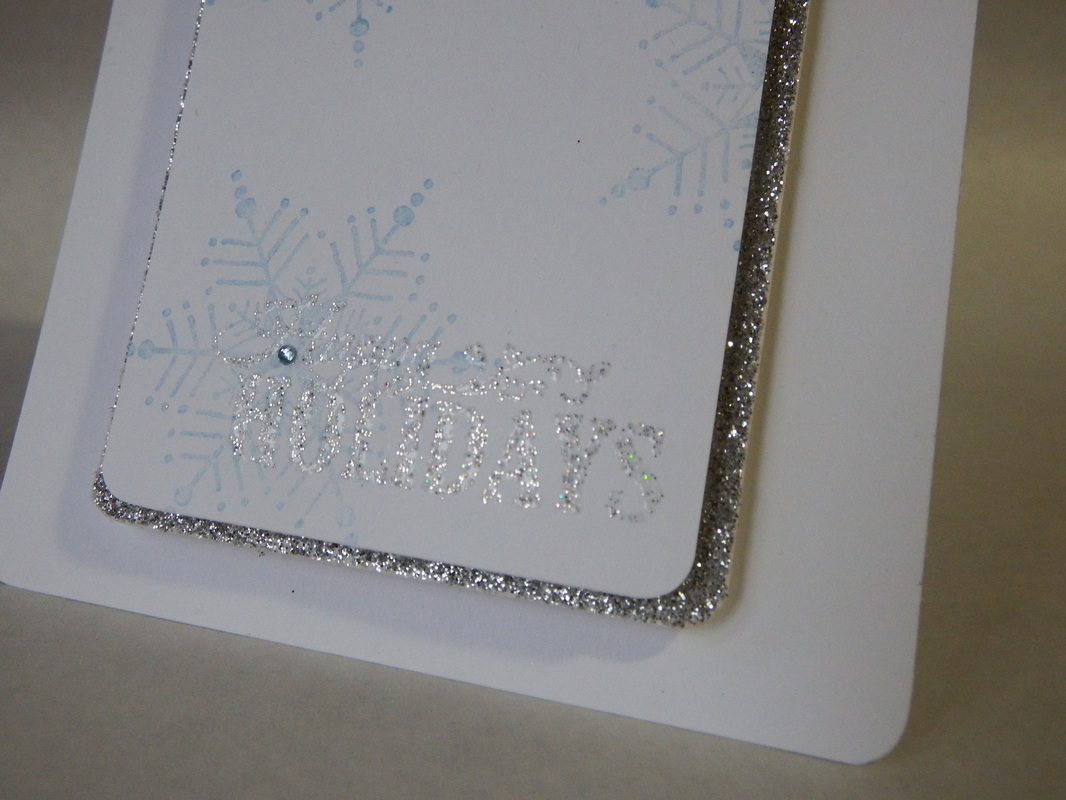
Here are a couple of close up looks at the embossing and snowflake details.
This sounds like a couple steps more than some of the other cards, but it really is an easy design and great for a beginner! I love anything that has snowflakes on it so I may be a bit partial to my card! Let me know what you think!
Leave me a comment below and let me know what draws you to a card or a certain design! If you know anyone that would enjoy my Christmas Card countdown, share my page and let them know! Your likes and shares are GREATLY appreciated!
So until tomorrow and Christmas card #10(already!)...
Craft on!
Leave me a comment below and let me know what draws you to a card or a certain design! If you know anyone that would enjoy my Christmas Card countdown, share my page and let them know! Your likes and shares are GREATLY appreciated!
So until tomorrow and Christmas card #10(already!)...
Craft on!

 RSS Feed